1. 크롤링 개념
1.1 크롤링
도서관에 무한이 많은 책이 있다. 이 책들 중 내가 원하는 책을 찾아야만 한다.
웹은 이 도서관과 같다. 웹 또한 계속하여 정보가 늘어나고 있고, 이 정보들을 검색할 수 있게끔 어딘가에 저장하여 관리해야 한다. 이를 위해 만들어진 것이 크롤링(crawling)이고, 그것을 소프트웨어로 만든 것이 크롤러(crawler)이다.
1.2 크롤러
조직적, 자동화된 방법으로 월드 와이드 웹을 탐색하는 컴퓨터 프로그램
- 위키백과
달라지는 웹 트렌드에 따라서 크롤러는 이에 맞춰서 자동화된 방법으로 데이터를 수집할 수 있어야 한다. 따라서 크롤러는 정교하고 어려운 기술이다.
크롤러가 작동하는 과정
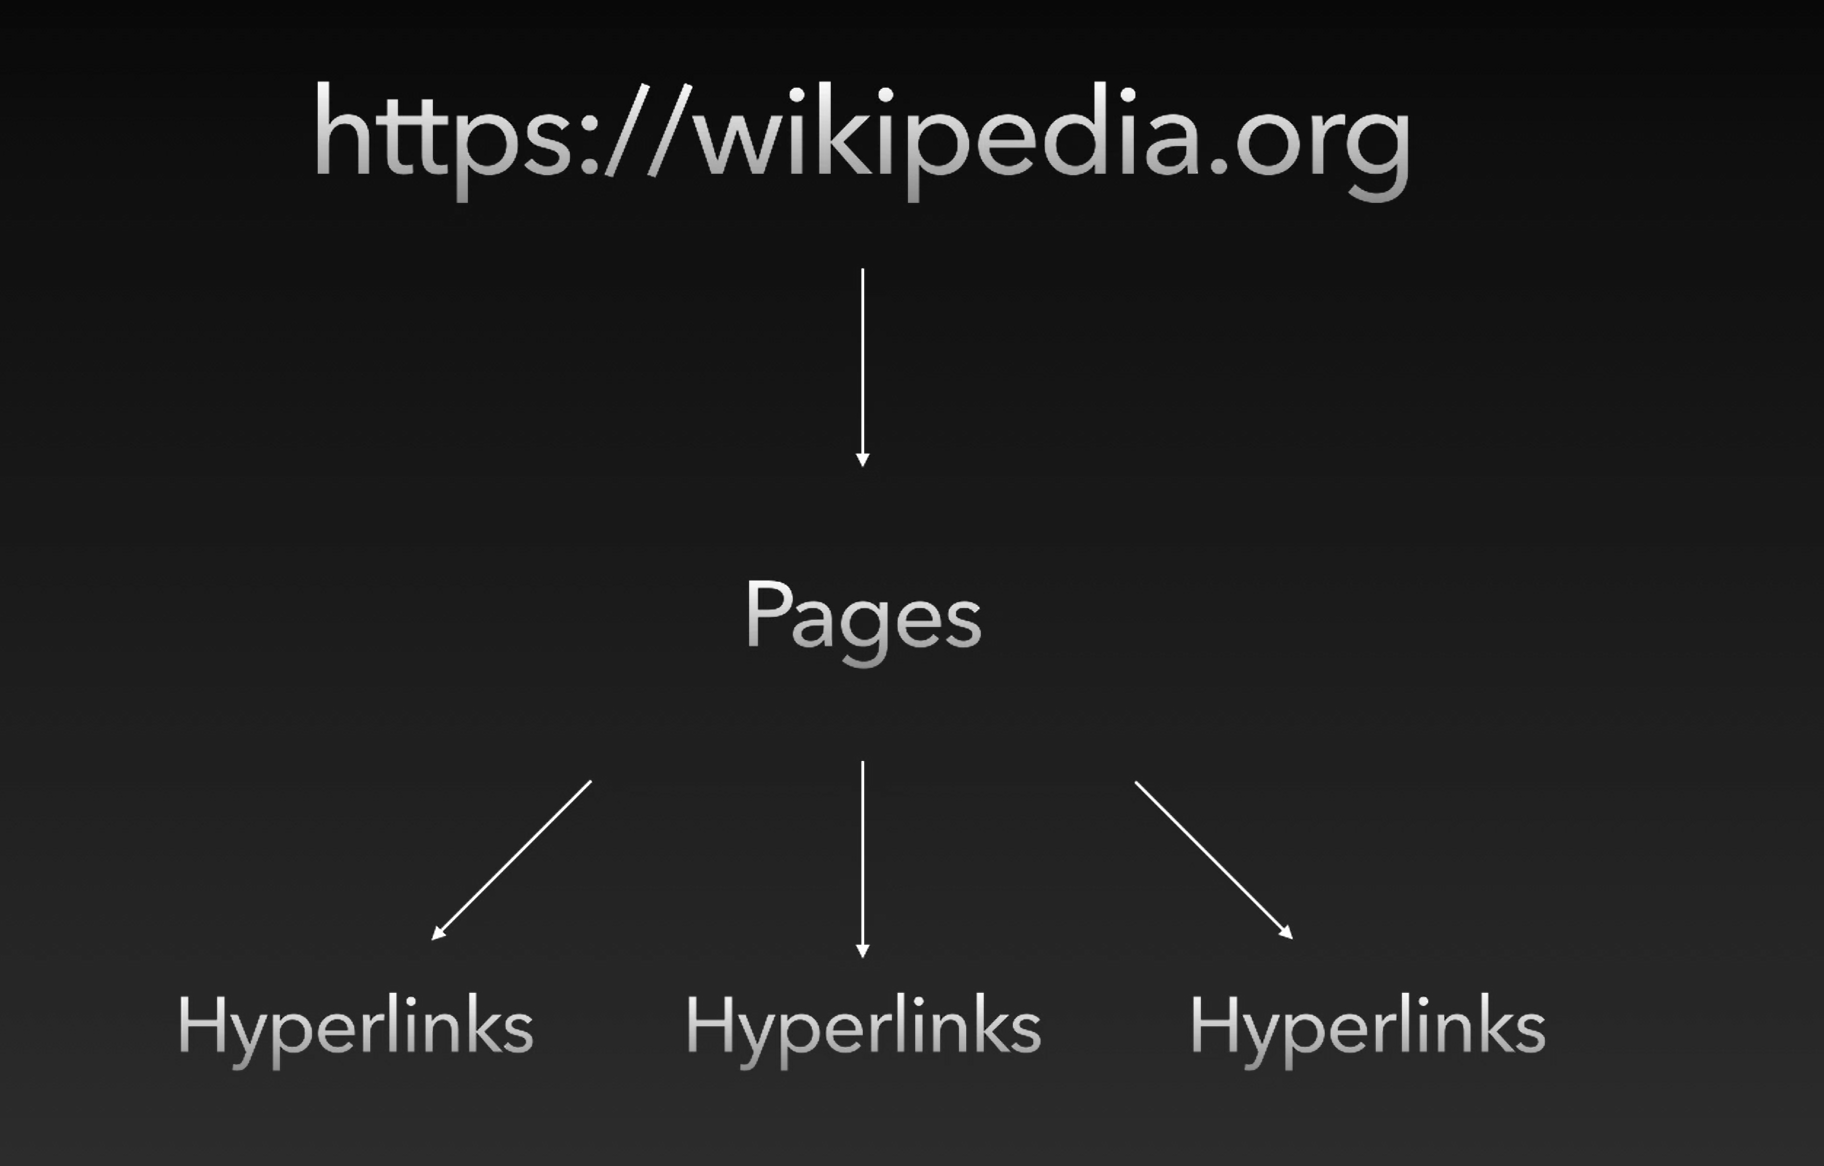
먼저 씨앗이라 불리는 사이트들(Seeds)을 정한다. 이 출발점으로 시작으로부터 크롤링을 시작한다.
예로 들어서 위키피디아(https://wikipedia.org) 사이트를 Seeds로 정했다고 하자. 이 웹 사이트 내에는 많은 페이지들이 있고 그 아래에 많은 하이퍼링크들이 있다. 크롤러는 먼저 이 페이지들을 검색을 하고, 하이퍼링크들을 모두 리스트 세워서 각 페이지의 제목은 뭐고, 어떤 내용을 담고 있고 등 정보를 정리하여 인덱싱 처리를 한다. 그리고 그 페이지 아래의 하이퍼링크들을 또 리스트 세우고 ... 일을 재귀적으로 반복한다.
웹 크롤러 vs 웹 스크레퍼
웹 스크레핑이란?
웹 사이트에서 원하는 정보를 자동으로 추출 & 수집하는 프로그램. 웹 스크레핑은 크롤링과 달리 지속적으로 탐색하지 않고 그저 개발자가 원하는 정보만 획득한다.
크롤링은 어려운 지식을 가져야하는 복잡한 기술이므로 알아야 할 필요는 없다. 하지만 웹 스크레핑을 공부하면 웹 크롤러의 기본적인 매커니즘을 이해할 수 있다. 따라서 크롤링 강좌에서 스크레핑을 가리치는 편이다.
2. robots.txt와 사이트 크롤링 정책
아무 웹 사이트나 크롤링하면 될까?
안된다. 법적인 문제로 고소를 당할 수도 있다(..) 따라서 크롤링할 사이트의 주소에서 robots.txt를 찾아보아야만 한다.
1.1 Robots.txt
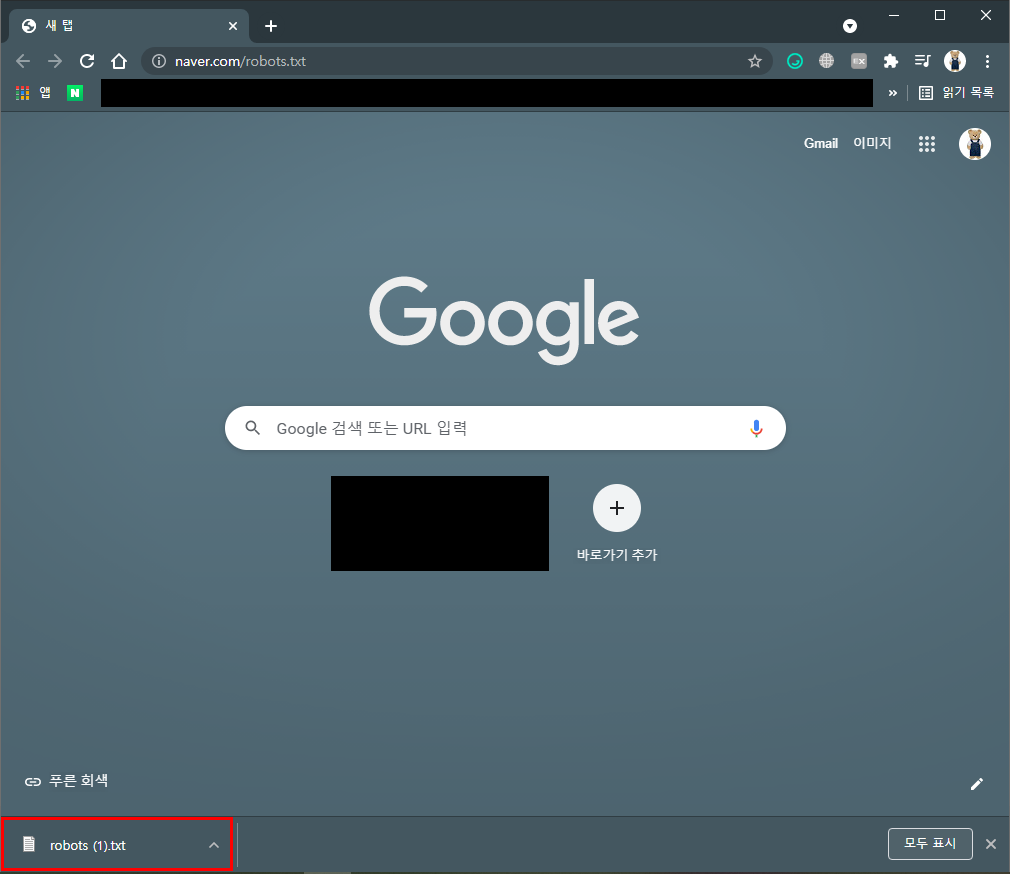
크롤러가 해당 사이트의 데이터를 수집하는 것을 허용할지 금지할지 알려주는 문서이다. 허용되는지 알고 싶은 웹 주소에 /robots.txt를 입력하고 엔터를 눌렀을 때 파일이 다운받아지면 허용된다는 의미이다.
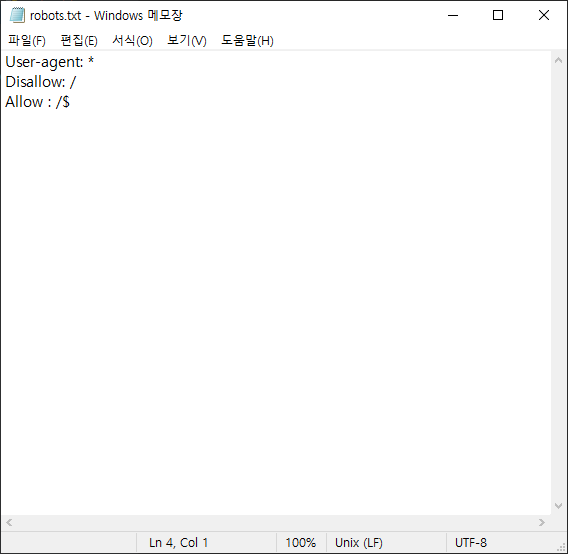
1.2 사이트 크롤링 정책 (3가지)
# Group 1 (주석)
User-agent: Googlebot
Disallow: /nogooglebot/
➡ /nogooglebot/user/1 와 같이 어떠한 주소의 path가 오더라도 크롤링을 하면 안된다.
# Group 2 (주석)
User-agent: *
Allow: /
➡ *는 모든 걸 포함한다는 의미이다. 즉 이는 어떠한 주소의 path가 오더라도 허락한다는 의미이다.
Sitemap: http://www.example.com/sitemap.xml
sitemap은 크롤링할 때 도움이 되도록 참고하라고 파일을 제공한다.
3. Axios Cheerio 사용해보기
1.1 크롤링에 사용되는 모듈
- Axios + Cheerio: 초기 개발된 크롤링 모듈
Selenium, beautifulsoup, scrapy:위의 모듈이 불편하여 추가로 개발된 크롤링 모듈- Puppeteer: 구글 크롬 개발팀에서 개발한 모듈
Selenium, beaiutifulsoup, scrapy를 다루지 않을 이유?
Selenium, beautifulsoup, scrapy는 이미 인터넷에 많이 있다. 특히 Selenium 파이썬에 최적화 되어 있는데, 우리는 파이썬이 아니라 Node.js을 기준으로 공부할 것이기 때문에 이들을 제외하고 Axios + Cheerio와 Puppeteer 두 가지를 다뤄볼 것이다.
1.2 Axios + Cheerio
- Axios: HTTP 요청을 페이지에 보내기 위해서
- Cheerio: HTTP 요청을 통해 받은 문자형이 HTML 파일을 파싱하기 위해 사용되는 것
➡ 즉, Axios는 HTTP 요청, Cheerio는 HTML DOM Parser를 위해 사용한다.
1.3 Axios 사용하기
Axios 설치하기
$ npm install axios
- FAST-C1 디렉터리를 생성하고 $ npm init 명령어를 입력하여 package.json을 생성한다.
- 그리고 $ touch index.js 명령어를 입력하여 index.js 파일을 생성한다. 앞으로 파일을 생성할 때에는 touch 명령어를 작성하도록 하자.
axios 기본 코드
axios를 통해 전송받은 response가 어떻게 이뤄져 있는지 살펴보자.
const axois = require('axios');

axois.get('http://example.com').then(response => {
    console.log(response)
});
$ node index.js를 입력하자.
$ node index.js
{
  status: 200,
  statusText: 'OK',
  headers: {
    age: '252063',
    'cache-control': 'max-age=604800',
    'content-type': 'text/html; charset=UTF-8',
    date: 'Sun, 20 Jun 2021 13:09:45 GMT',
    etag: '"3147526947+ident"',
    expires: 'Sun, 27 Jun 2021 13:09:45 GMT',
    'last-modified': 'Thu, 17 Oct 2019 07:18:26 GMT',
    server: 'ECS (oxr/830F)',
    vary: 'Accept-Encoding',
    'x-cache': 'HIT',
    'content-length': '1256',
    connection: 'close'
  },
  config: {
    url: 'http://example.com',
    method: 'get',
    headers: {
      Accept: 'application/json, text/plain, */*',
      'User-Agent': 'axios/0.21.1'
    },
    transformRequest: [ [Function: transformRequest] ],
    transformResponse: [ [Function: transformResponse] ],
    timeout: 0,
    adapter: [Function: httpAdapter],
    xsrfCookieName: 'XSRF-TOKEN',
    xsrfHeaderName: 'X-XSRF-TOKEN',
    maxContentLength: -1,
    maxBodyLength: -1,
    validateStatus: [Function: validateStatus],
    data: undefined
  },
  request: ClientRequest {
    _events: [Object: null prototype] {
      socket: [Function],
      abort: [Function],
      aborted: [Function],
      connect: [Function],
      error: [Function],
      timeout: [Function],
      prefinish: [Function: requestOnPrefinish]
    },
    _eventsCount: 7,
    _maxListeners: undefined,
    outputData: [],
    outputSize: 0,
    writable: true,
    _last: true,
    chunkedEncoding: false,
    shouldKeepAlive: false,
    useChunkedEncodingByDefault: false,
    sendDate: false,
    _removedConnection: false,
    _removedContLen: false,
    _removedTE: false,
    _contentLength: 0,
    _hasBody: true,
    _trailer: '',
    finished: true,
    _headerSent: true,
    socket: Socket {
      connecting: false,
      _hadError: false,
      _parent: null,
      _host: 'example.com',
      _readableState: [ReadableState],
      readable: true,
      _events: [Object: null prototype],
      _eventsCount: 7,
      _maxListeners: undefined,
      _writableState: [WritableState],
      writable: false,
      allowHalfOpen: false,
      _sockname: null,
      _pendingData: null,
      _pendingEncoding: '',
      server: null,
      _server: null,
      parser: null,
      _httpMessage: [Circular],
      [Symbol(asyncId)]: 4,
      [Symbol(kHandle)]: [TCP],
      [Symbol(kSetNoDelay)]: false,
      [Symbol(lastWriteQueueSize)]: 0,
      [Symbol(timeout)]: null,
      [Symbol(kBuffer)]: null,
      [Symbol(kBufferCb)]: null,
      [Symbol(kBufferGen)]: null,
      [Symbol(kCapture)]: false,
      [Symbol(kBytesRead)]: 0,
      [Symbol(kBytesWritten)]: 0
    },
    connection: Socket {
      connecting: false,
      _hadError: false,
      _parent: null,
      _host: 'example.com',
      _readableState: [ReadableState],
      readable: true,
      _events: [Object: null prototype],
      _eventsCount: 7,
      _maxListeners: undefined,
      _writableState: [WritableState],
      writable: false,
      allowHalfOpen: false,
      _sockname: null,
      _pendingData: null,
      _pendingEncoding: '',
      server: null,
      _server: null,
      parser: null,
      _httpMessage: [Circular],
      [Symbol(asyncId)]: 4,
      [Symbol(kHandle)]: [TCP],
      [Symbol(kSetNoDelay)]: false,
      [Symbol(lastWriteQueueSize)]: 0,
      [Symbol(timeout)]: null,
      [Symbol(kBuffer)]: null,
      [Symbol(kBufferCb)]: null,
      [Symbol(kBufferGen)]: null,
      [Symbol(kCapture)]: false,
      [Symbol(kBytesRead)]: 0,
      [Symbol(kBytesWritten)]: 0
    },
    _header: 'GET / HTTP/1.1\r\n' +
      'Accept: application/json, text/plain, */*\r\n' +
      'User-Agent: axios/0.21.1\r\n' +
      'Host: example.com\r\n' +
      'Connection: close\r\n' +
      '\r\n',
    _onPendingData: [Function: noopPendingOutput],
    agent: Agent {
      _events: [Object: null prototype],
      _eventsCount: 2,
      _maxListeners: undefined,
      defaultPort: 80,
      protocol: 'http:',
      options: [Object],
      requests: {},
      sockets: [Object],
      freeSockets: {},
      keepAliveMsecs: 1000,
      keepAlive: false,
      maxSockets: Infinity,
      maxFreeSockets: 256,
      [Symbol(kCapture)]: false
    },
    socketPath: undefined,
    method: 'GET',
    insecureHTTPParser: undefined,
    path: '/',
    _ended: true,
    res: IncomingMessage {
      _readableState: [ReadableState],
      readable: false,
      _events: [Object: null prototype],
      _eventsCount: 3,
      _maxListeners: undefined,
      socket: [Socket],
      connection: [Socket],
      httpVersionMajor: 1,
      httpVersionMinor: 1,
      httpVersion: '1.1',
      complete: true,
      headers: [Object],
      rawHeaders: [Array],
      trailers: {},
      rawTrailers: [],
      aborted: false,
      upgrade: false,
      url: '',
      method: null,
      statusCode: 200,
      statusMessage: 'OK',
      client: [Socket],
      _consuming: false,
      _dumped: false,
      req: [Circular],
      responseUrl: 'http://example.com/',
      redirects: [],
      [Symbol(kCapture)]: false
    },
    aborted: false,
    timeoutCb: null,
    upgradeOrConnect: false,
    parser: null,
    maxHeadersCount: null,
    reusedSocket: false,
    _redirectable: Writable {
      _writableState: [WritableState],
      writable: true,
      _events: [Object: null prototype],
      _eventsCount: 2,
      _maxListeners: undefined,
      _options: [Object],
      _ended: true,
      _ending: true,
      _redirectCount: 0,
      _redirects: [],
      _requestBodyLength: 0,
      _requestBodyBuffers: [],
      _onNativeResponse: [Function],
      _currentRequest: [Circular],
      _currentUrl: 'http://example.com/',
      [Symbol(kCapture)]: false
    },
    [Symbol(kCapture)]: false,
    [Symbol(kNeedDrain)]: false,
    [Symbol(corked)]: 0,
    [Symbol(kOutHeaders)]: [Object: null prototype] {
      accept: [Array],
      'user-agent': [Array],
      host: [Array]
    }
  },
  data: '<!doctype html>\n' +
    '<html>\n' +
    '<head>\n' +
    '    <title>Example Domain</title>\n' +
    '\n' +
    '    <meta charset="utf-8" />\n' +
    '    <meta http-equiv="Content-type" content="text/html; charset=utf-8" />\n' +
    '    <meta name="viewport" content="width=device-width, initial-scale=1" />\n' +
    '    <style type="text/css">\n' +
    '    body {\n' +
    '        background-color: #f0f0f2;\n' +
    '        margin: 0;\n' +
    '        padding: 0;\n' +
    '        font-family: -apple-system, system-ui, BlinkMacSystemFont, "Segoe UI", "Open Sans", "Helvetica Neue", Helvetica, Arial, sans-serif;\n' +
    '        \n' +
    '    }\n' +
    '    div {\n' +
    '        width: 600px;\n' +
    '        margin: 5em auto;\n' +
    '        padding: 2em;\n' +
    '        background-color: #fdfdff;\n' +
    '        border-radius: 0.5em;\n' +
    '        box-shadow: 2px 3px 7px 2px rgba(0,0,0,0.02);\n' +
    '    }\n' +
    '    a:link, a:visited {\n' +
    '        color: #38488f;\n' +
    '        text-decoration: none;\n' +
    '    }\n' +
    '    @media (max-width: 700px) {\n' +
    '        div {\n' +
    '            margin: 0 auto;\n' +
    '            width: auto;\n' +
    '        }\n' +
    '    }\n' +
    '    </style>    \n' +
    '</head>\n' +
    '\n' +
    '<body>\n' +
    '<div>\n' +
    '    <h1>Example Domain</h1>\n' +
    '    <p>This domain is for use in illustrative examples in documents. You may use this\n' +
    '    domain in literature without prior coordination or asking for permission.</p>\n' +
    '    <p><a href="https://www.iana.org/domains/example">More information...</a></p>\n' +
    '</div>\n' +
    '</body>\n' +
    '</html>\n'
}
현재 상태는 200이고 headers도 있고 ... 그렇군! 너무 기니까 코드를 수정하여 response를 구성하는 키들을 콘솔 띄워보자.
const axois = require('axios');

axois.get('http://example.com').then(response => {
    console.log(Object.keys(response))
});
$ node index.js
[ 'status', 'statusText', 'headers', 'config', 'request', 'data' ]response의 키들 중에서 data 내용을 살펴보자.
const axois = require('axios');

axois.get('http://example.com').then(response => {
    // console.log(Object.keys(response))
    console.log(response.data)
});
$ node index.js
<!doctype html>
<html>
<head>
<title>Example Domain</title>
<meta charset="utf-8" />
<meta http-equiv="Content-type" content="text/html; charset=utf-8" />
<meta name="viewport" content="width=device-width, initial-scale=1" />
<style type="text/css">
body {
background-color: #f0f0f2;
margin: 0;
padding: 0;
font-family: -apple-system, system-ui, BlinkMacSystemFont, "Segoe UI", "Open Sans", "Helvetica Neue", Helvetica, Arial, sans-serif;
}
div {
width: 600px;
margin: 5em auto;
padding: 2em;
background-color: #fdfdff;
border-radius: 0.5em;
box-shadow: 2px 3px 7px 2px rgba(0,0,0,0.02);
}
a:link, a:visited {
color: #38488f;
text-decoration: none;
}
@media (max-width: 700px) {
div {
margin: 0 auto;
width: auto;
}
}
</style>
</head>
<body>
<div>
<h1>Example Domain</h1>
<p>This domain is for use in illustrative examples in documents. You may use this
domain in literature without prior coordination or asking for permission.</p>
<p><a href="https://www.iana.org/domains/example">More information...</a></p>
</div>
</body>
</html>html 파일 데이터를 문자열로 담고 있다는 것을 확인할 수 있다.
1.4 Cheerio 사용하기
이제 Axios를 이용하여 이렇게 모든 데이터를 얻을 수 있다는 것을 확인했다. 하지만 우리는 크롤링을 배우고 있다. 이 모든 데이터에서 우리가 원하는 데이터를 어떻게 추출할 수 있을까? 이때 사용하는 것이 Cheerio이다.
Cheerio는 획득한 HTML 문서를 다루기 쉽게 파싱해준다. cheerio는 jQuery의 문법과 거의 동일하다. 어렵지 않으므로 쉽고 편하게 쓸 수 있다.
Cheerio 설치하기
$ npm i cheerio
Cheerio 작동 방식
const $ = cheerio.load('html 코드')
다음과 같이 작성하면 이제 $는 .load 메소드에 들어간 html 코드가 파싱된 상태이다.
- h1에 할당된 텍스트 가져오기
const axois = require('axios');
const cheerio = require('cheerio');

axois.get('http://example.com').then(response => {
    const htmlString = response.data;
    const $ = cheerio.load(htmlString);
    const h1 = $('h1').text(); // h1에 할당된 텍스트 획득
    console.log(h1);
});
$ node index.js
Example Domain- href 가져오기
const axois = require('axios');
const cheerio = require('cheerio');

axois.get('http://example.com').then(response => {
    const htmlString = response.data;
    const $ = cheerio.load(htmlString);
    const href = $('a').attr('href');
    console.log(href);
});
$ node index.js
https://www.iana.org/domains/example
4. 렌더링 지연 알아보기
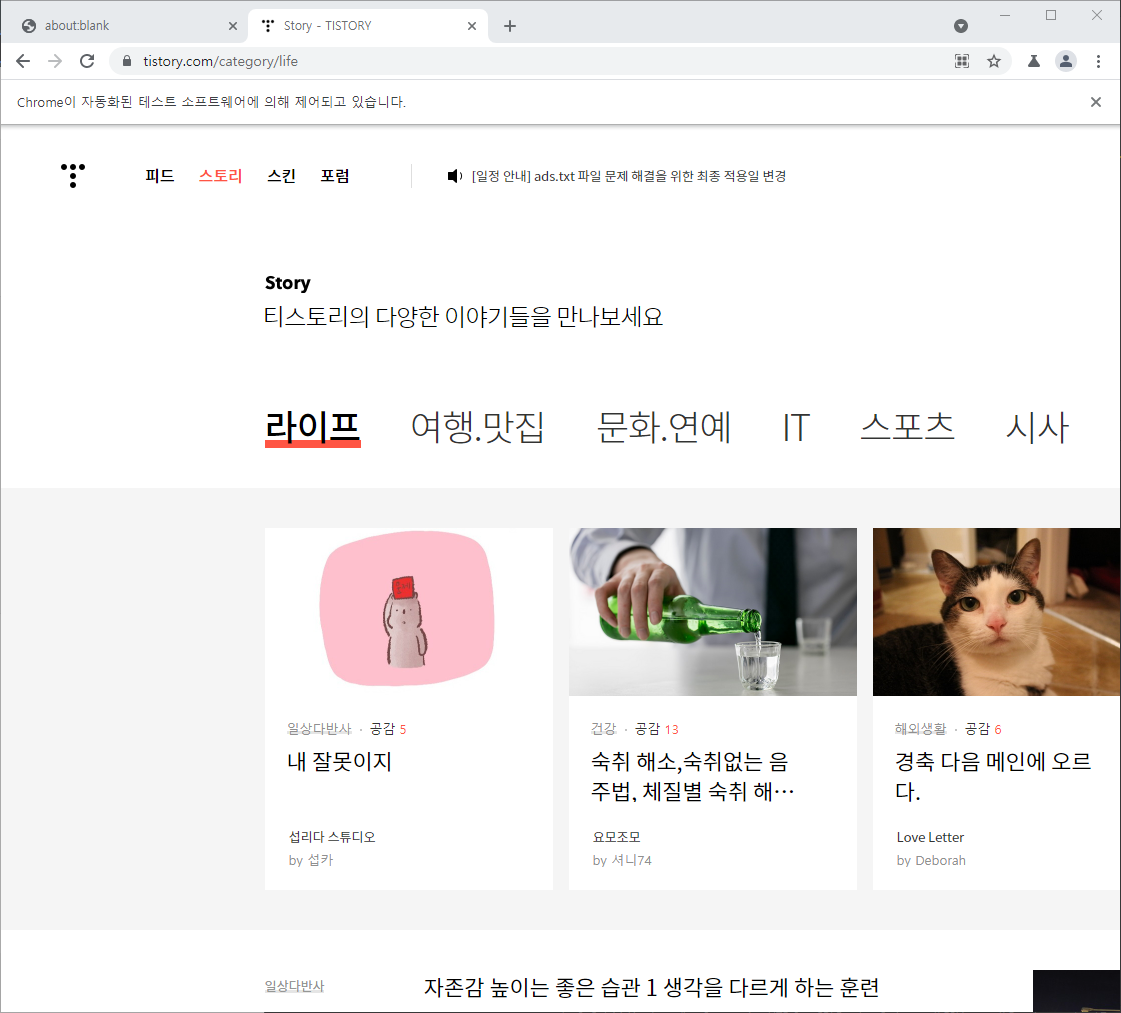
axios, cheerio를 사용하여 크롤링이 실제로 작동이 잘 되는지 확인해보자. tistory 웹 사이트를 예제로 사용하여 확인해볼 것이다. 왜냐하면 tistory 웹 사이트에서 robots.txt를 허용하고 있기 때문에 크롤링을 확인하고 있기 때문이다.
우선 잘 나오는지 확인해보자.
const axois = require('axios');
const cheerio = require('cheerio');
axois.get('https://www.tistory.com/category/life').then(response => {
const htmlString = response.data;
console.log(htmlString);
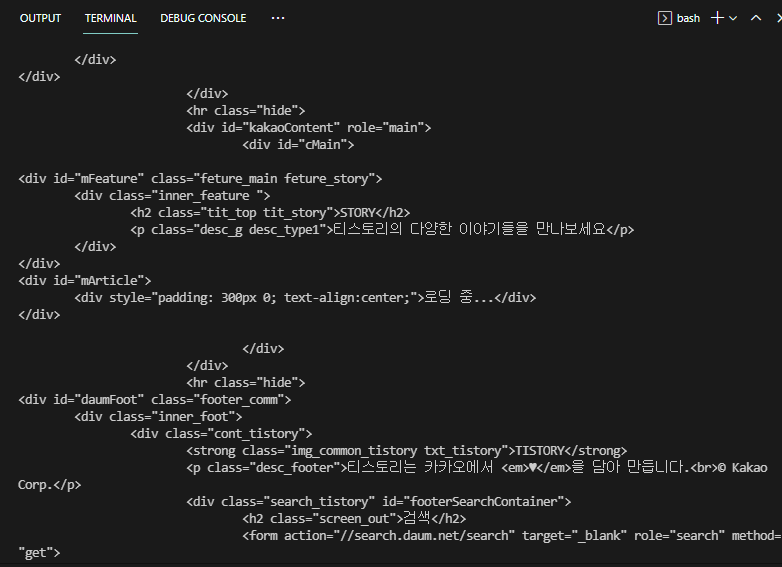
});실행해보면 콘솔을 통해 잘 나온다. 그러나 콘솔을 둘러보다보면 뭔가 이상하다. 중간에 보면 '로딩 중...'이라는 글자가 있는데, 사이트에 검색하면 이러한 글자는 없다.
개발자 도구를 켜고 Network를 누른 후 새로고침을 하자. 그리고 맨 위에 뜨는 life를 클릭하자.
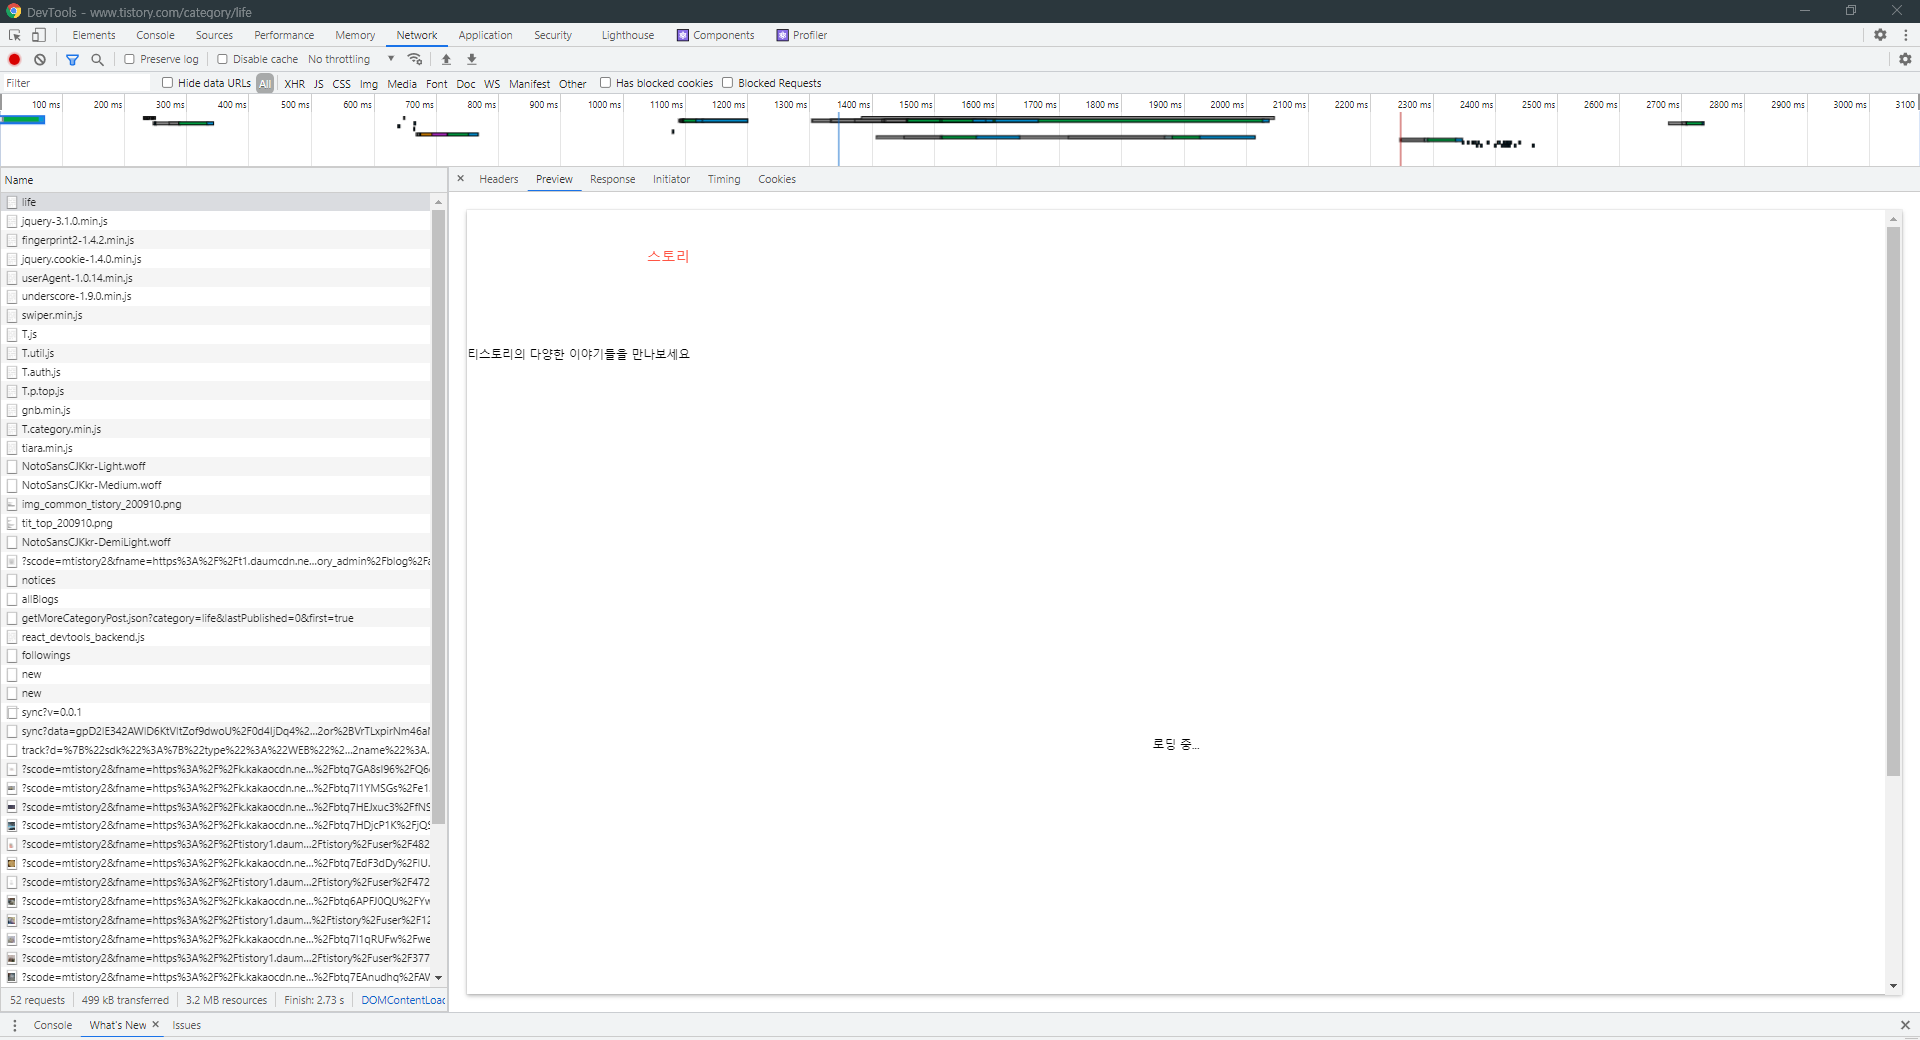
preview를 눌러보면 로딩 중... 이라고 떠 있다. 실제로 우리가 보고 있는 웹 사이트는 완성된 형태인데, 왜 이 파일은 이렇게 뜰까?
왜냐하면 이 파일은 꼭 필요한 정보만을 담고 있는 전체 중 일부분의 html 파일 데이터만을 가지고 있기 때문이다. 이를 먼저 보낸 후, 나머지 정보들을 추가로 보내준다.
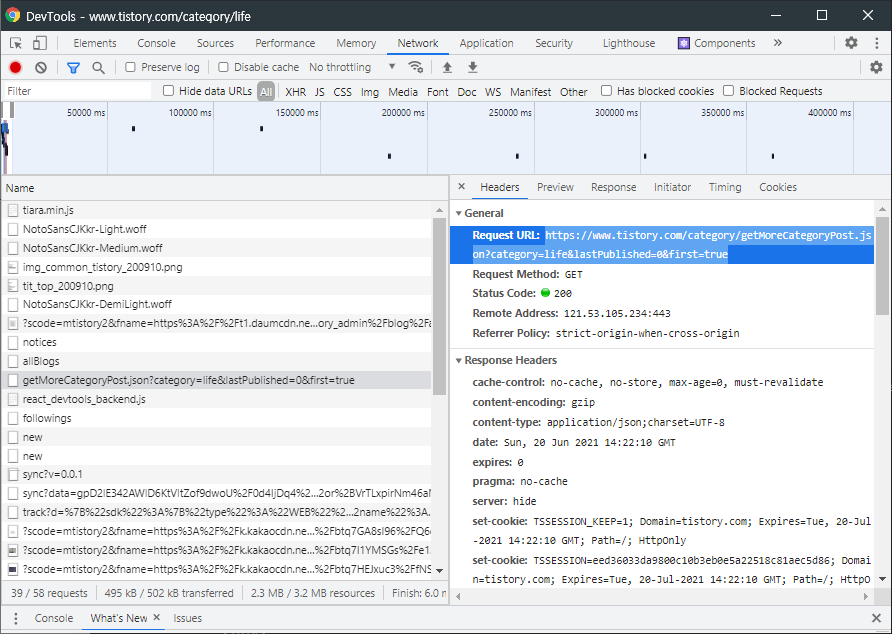
크롤링을 하려는데 우리가 크롤링하려는 정보는 로딩 중... 정보를 포함하고 있는 정보가 아니다. 우리가 원하는 데이터를 가져오려면 전송 받은 모든 파일들의 데이터를 살펴보면서 데이터 요청이 어디서부터 오는지 알아야 한다.
많은 파일 중에서 해당 파일을 골라 Request URL을 복사하고 index.js에 붙여넣기 해보자.
const axois = require('axios');
const cheerio = require('cheerio');
axois.get('https://www.tistory.com/category/getMoreCategoryPost.json?category=life&lastPublished=0&first=true').then(response => {
const htmlString = response.data;
console.log(htmlString);
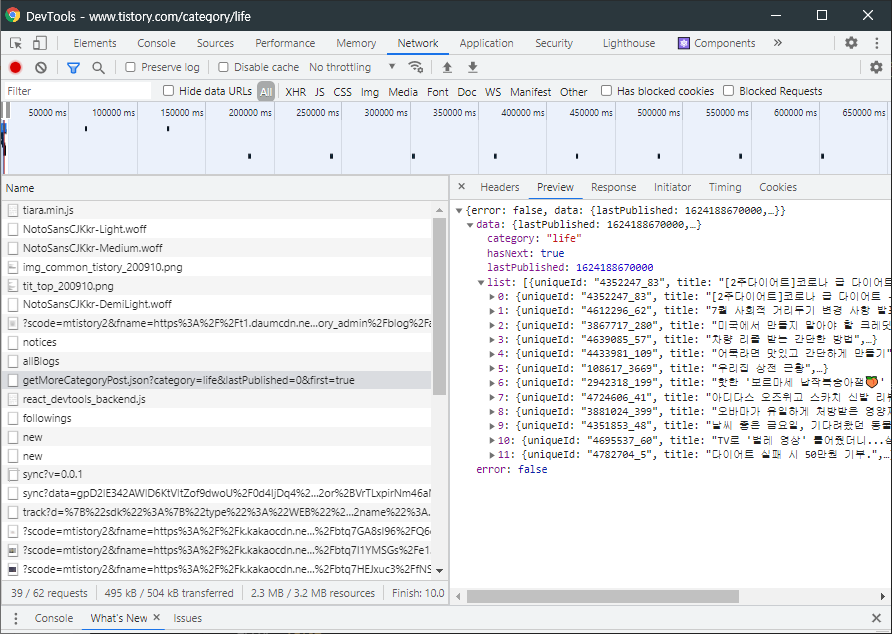
});$ node index.js
{
error: false,
data: {
lastPublished: 1624189336000,
list: [
[Object], [Object],
[Object], [Object],
[Object], [Object],
[Object], [Object],
[Object], [Object],
[Object], [Object]
],
category: 'life',
hasNext: true
}
}이는 크롬 개발자 도구를 통해 본 내용과 동일하다.
이제 게시글과 관련된 전체 데이터를 가져왔으니 게시글 데이터로 솎아내자. 아래는 게시글의 제목만 가져오는 코드이다.
const axois = require('axios');
const cheerio = require('cheerio');

axois.get('https://www.tistory.com/category/getMoreCategoryPost.json?category=life&lastPublished=0&first=true').then(response => {
    const htmlString = response.data;
    for(let i = 0; i < htmlString.data.list.length; i++) {
        console.log(htmlString.data.list[i]['title'])
    }
});
$ node index.js
[2주다이어트]코로나 급 다이어트 -5kg --- 10일차(58.2kg)
7월 사회적 거리두기 변경 사항 발표!
미국에서 만들지 말아야 할 크레딧 카드
맛있는 수박 고르는법 수박 효능
차량 리콜 받는 간단한 방법
어묵라면 맛있고 간단하게 만들기
영어공부_아침관련_make my bed
강서구 공항동-전주뜰 콩나물국밥~
우리집 상전 근황
핫한 '보르마세 납작복숭아잼�' 을 먹어보았습니다!
아디다스 오즈위고 스카치 신발 리뷰
오바마가 유일하게 처방받은 영양제는?
하지만 보안이 철저하거나 특정 조건에서만 정보를 주는 웹 서비스가 많아서 정보를 얻을 수 없거나 컨트롤하여 정보를 얻어야 하는 경우가 대부분이다. 그런 경우에 사용하는 것이 바로 Puppeteer이다.
Puppeteer를 사용하면 위의 티스토리 사이트 예제와 같이 딜레이되어 로딩되는 정보들, 혹은 브라우저에서 내가 액션을 취하여야만 정보를 얻을 수 있는 모든 정보들을 그러지 않고도 획득할 수 있다!
5. Puppeteer 살펴보기
구글에서 Puppeteer를 만들었다. Puppeteer는 다양한 기능을 가지고 있기 떄문에 '크롤링을 위한 도구다'고 말하기는 어렵다. Puppeteer의 정의를 살펴보자.
Node library which provides a high-level API
to control Chrome or Chromium over the DevTools Protocol.
(https://pptr.dev/)
- Node.js를 통해 크롬 브라우저를 실행한다.
- 사용자가 원하는 뷰포트, 네트워크 환경 등 설정이 가능하다.
- 마우스, 키보드, 터치 스크린 등을 코드를 통해 사람이 사용하는 것처럼 구현이 가능하다.
- 타임라인 트레이싱, 스크린샷, PDF 다운로드, 확장 프로그램 테스트, 작업 자동화 등 사용 가능하다.
- SPA(Single-Page Application) 크롤링과 pre-rendered content 생성이 가능하다.
https://pptr.dev/
pptr.dev
Puppeteer 설치
$ npm i puppeteerpuppeteer-core 버전도 있는데, 대부분은 그냥 가벼운 puppeteer 버전을 설치한다. puppeteer-core 버전은 Chromium 버전을 설치하지 않기 때문이다.
Puppeteer 사용법
- 코드1
const puppeteer = require('puppeteer');

(async () => {
  const browser = await puppeteer.launch();
  const page = await browser.newPage(); // 새로운 페이지 생성
  await page.goto('https://example.com'); // 사이트 이동
  await page.screenshot({ path: 'example.png' }); // 스크린샷 찍기: 해당 파일과 동일한 위치에 파일이 생성된다
  await browser.close();
})();
➡ IIFE (즉시 실행 함수): 사실 위의 코드는 다음 코드(코드2)와 동일하다.
const pptr = async () => {
    const browser = await puppeteer.launch();
    const page = await browser.newPage();
    await page.goto('https://example.com');
    await page.screenshot({ path: 'example.png' });

    await browser.close();
  };

  pptr();
코드1은 이름이 없이 바로 실행하고 싶은 경우에 사용한다. 사용법은 함수를 소괄호()로 감싸준 후에 ();를 붙이면 즉시 바로 실행된다.
이제 파일을 실행해보자.
$ node pptr.js그러면 pptr.js 파일과 동일한 위치에 example.png 파일이 생성된다. 파일을 확인해보니 스크린샷이 찍혔다!
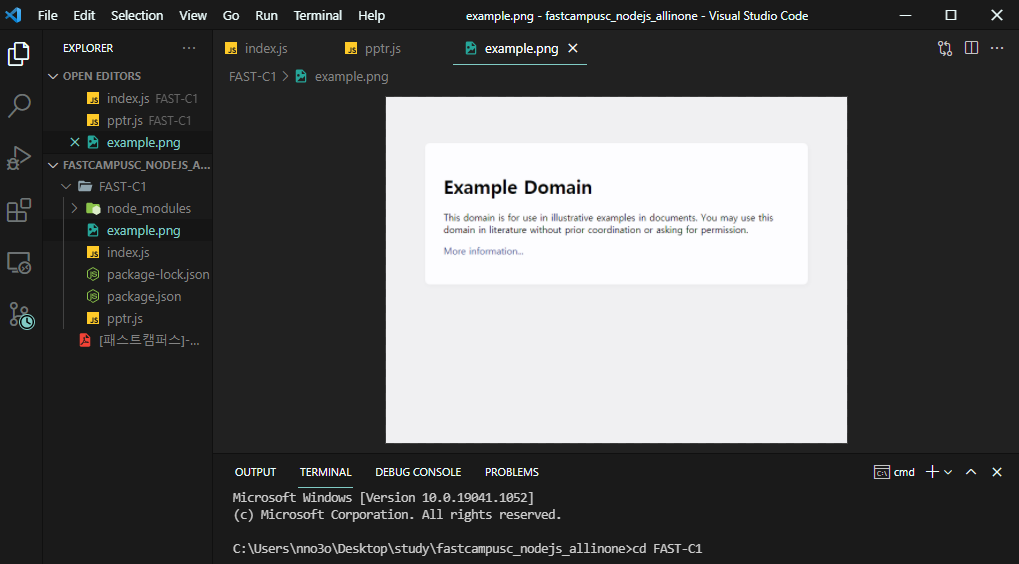
이처럼 Puppeteer를 사용하면 손쉽게 스크린샷을 찍을 수도 있고, 키보드나 마우스를 제어하거나 트레이싱, 터치스크린도 실행할 수 있다. 브라우저가 가진 대부분 기능들은 가지고 있다고 생각하면 된다.
아까 티스토리에서 딜레이 로딩 때문에 데이터를 가져오지 못했다. 달리 말하면 브라우저가 조금 기다린 후에 정보를 획득하면 크롤링이 잘 될 것이다! 이렇게 어떤 element가 나타날 때까지 기다리는 것도 Puppeteer를 통해 구현할 수 있다.
6. Puppeteer를 사용해 크롤링하기
목표
- Puppeteer의 다른 기능들을 살펴보고 여러가지 내장 메서드들을 사용해보면서 Puppeteer로 실제 크롤링해보기
백그리운드에서 Puppeteer를 실행하여 크롬 브라우저를 작동시킬 수도 있고, 혹은 보이는 형태로도 작동시킬 수도 있다고 했었다. 이를 하기 위해서는 .launch() 내에 headless를 넣으면 된다. default값이 true이므로 false로 작성해준다.
const puppeteer = require('puppeteer');

(async () => {
  const browser = await puppeteer.launch({
      headless: false
  });
  const page = await browser.newPage(); // 새로운 페이지 생성
  await page.goto('https://example.com'); // 사이트 이동
})();
이제 https://example.com 에 접속하여 창이 계속 열린 상태가 된다. 실제로 작동시켜보자.
$ node pptr
그러면 자동적으로 크롬 브라우저가 뜨고, 상단에 'Chrome이 자동화된 테스트 소프트웨어에 의해 제어되고 있습니다'라고 적혀있다. Puppeteer의 API를 사용하여 크롬 브라우저를 통제하고 있다는 의미이다.
▪ 화면 사이즈 조절하기
const puppeteer = require('puppeteer');

(async () => {
  const browser = await puppeteer.launch({
      headless: false
  });
  const page = await browser.newPage(); // 새로운 페이지 생성
  await page.setViewport({
      width: 1440,
      height: 1080
  });
  await page.goto('https://example.com'); // 사이트 이동
})();
페이지를 띄울 때 작성한 사이즈에 맞게 화면을 띄운다. (현재 띄운 창 크기가 아니라, 내용물을 띄울 사이즈의 크기를 말하는 것이다.)
(+) nodemon 모듈
파일의 변화를 감지하여 자동으로 코드를 재실행시키는 모듈이다. 보통 local directory보다는 global로 설치한다.
- 설치
$ npm i -g nodemon- 실행
$ nodemon [파일명]
▪ 티스토리의 데이터 가져오기 (로딩중으로 안나오는 부분이 나오는지 확인하기)
const puppeteer = require('puppeteer');

(async () => {
  const browser = await puppeteer.launch({
      headless: false
  });
  const page = await browser.newPage(); // 새로운 페이지 생성
  await page.setViewport({
      width: 1440,
      height: 1080
  });
})();
로딩중이 뜨지 않고 잘 화면이 잘 뜬다.
puppeteer를 이용하면 페이지의 html 파일을 간단하게 가져올 수 있다. 다음 한 줄만 작성하면 된다.
const html = await page.content();전체 코드는 다음과 같다.
const puppeteer = require('puppeteer');

(async () => {
  const browser = await puppeteer.launch({
      headless: false
  });
  const page = await browser.newPage(); // 새로운 페이지 생성
  await page.setViewport({
      width: 1440,
      height: 1080
  });
  await page.goto('https://www.tistory.com/category/life'); // 사이트 이동
  const html = await page.content(); // puppeteer를 이용하여 페이지의 html파일 가져오기
  console.log(html)
})();
- console 결과
<!DOCTYPE html><html lang="ko"><head>
                <meta charset="utf-8">
                <meta property="og:url" content="https://www.tistory.com">
                <meta property="og:site_name" content="TISTORY">
                <meta property="og:title" content="TISTORY">
                <meta property="og:description" content="나를 표현하는 블로그를 만들어보세요.">
                <meta property="og:image" content="//t1.daumcdn.net/tistory_admin/static/images/openGraph/opengraph.png">
                <title>Story - TISTORY</title>
                <link rel="shortcut icon" href="//t1.daumcdn.net/tistory_admin/static/top/favicon.ico">
                <link rel="apple-touch-icon" href="//t1.daumcdn.net/tistory_admin/static/images/openGraph/180x180.png">
                <link rel="apple-touch-icon" sizes="76x76" href="//t1.daumcdn.net/tistory_admin/static/images/openGraph/76x76.png">
                <link rel="apple-touch-icon" sizes="120x120" href="//t1.daumcdn.net/tistory_admin/static/images/openGraph/120x120.png">
                <link rel="apple-touch-icon" sizes="152x152" href="//t1.daumcdn.net/tistory_admin/static/images/openGraph/152x152.png">
                <link rel="stylesheet" type="text/css" href="//t1.daumcdn.net/tistory_admin/assets/tistory-web-top/1622440053/static/css/ext/swiper.min.css">
                <link rel="stylesheet" type="text/css" href="//t1.daumcdn.net/tistory_admin/www/style/top/font.css">
                <link rel="stylesheet" type="text/css" href="https://t1.daumcdn.net/tistory_admin/assets/tistory-gnb/3.2.3/gnb.min.css">
                <link rel="stylesheet" type="text/css" href="//t1.daumcdn.net/tistory_admin/assets/tistory-web-top/1622440053/static/css/pc/top.css">
<!--[if lt IE 9]>
<script src="https://t1.daumcdn.net/tistory_admin/lib/jquery-1.12.4.min.js"></script>
<![endif]-->
<!--[if gte IE 9]><!-->
<script src="https://t1.daumcdn.net/tistory_admin/lib/jquery-3.1.0.min.js"></script>
<!--<![endif]-->
<script src="https://t1.daumcdn.net/tistory_admin/lib/fingerprint2-1.4.2.min.js"></script>
<script type="text/javascript" src="//m1.daumcdn.net/svc/original/U03/cssjs/jquery/plugin/jquery.cookie-1.4.0.min.js"></script>
<script type="text/javascript" src="//s1.daumcdn.net/svc/original/U03/cssjs/userAgent/userAgent-1.0.14.min.js"></script>
                <meta id="_csrf" name="_csrf" content="d994b4e8-5a06-41cf-b2aa-2397dca2d61d">
                <meta id="_csrf_header" name="_csrf_header" content="X-CSRF-TOKEN">
        </head>
        <body>
                <div id="kakaoIndex"><!-- 웹접근성용 바로가기 링크 모음 -->
                        <a href="#kakaoBody">본문 바로가기</a>
                        <a href="#kakaoLnb">메뉴 바로가기</a> <!-- 2017-05-31 수정 : href 값 kakaoGnb -> kakaoLnb 로 변경 -->
                </div>

                <div id="kakaoWrap" class="">
                        <div id="kakaoHead" role="banner" class="#GNB kakao_head  head_type1"><div class="inner_header tistory"><h1><a href="https://www.tistory.com/" id="kakaoServiceLogo" class="#logo link_logo"><span class="img_common_tistory tit_tistory tit_tistory_white">티스토리</span><span class="img_common_tistory tit_tistory tit_tistory_black"></span></a></h1><div id="kakaoGnb" role="navigation" class="gnb_tistory"><h2 class="screen_out">서비스 주요 메뉴</h2><ul class="list_gnb"><li class=""><a href="https://www.tistory.com/feed" class="#feed link_gnb">피드</a></li><li class="on"><a href="https://www.tistory.com/category" class="#story link_gnb">스토리</a></li><li class=""><a href="https://www.tistory.com/skin" class="#skin link_gnb">스킨</a></li><li class=""><a href="https://www.tistory.com/community" class="#forum link_gnb">포럼</a></li></ul></div><div class="notice_tistory"><h2 class="screen_out">공지사항</h2><span class="img_common_tistory ico_notice ico_white"></span><span class="img_common_tistory ico_notice ico_black"></span><a href="https://notice.tistory.com/2588" class="desc_notice" target="_blank">[일정 안내] ads.txt 파일 문제 해결을 위한 최종 적용일 변경</a></div><div class="info_tistory"><div class="logn_tistory"><h2 class="screen_out">로그인정보</h2><a href="https://www.tistory.com/auth/login" class="btn_tistory btn_log_info">시작하기</a></div></div></div></div>
                        <hr class="hide">
                        ...
여기서 cheerio를 사용하여 html을 파싱하고 원하는 데이터를 찾기 쉽게 만들자.
const $ = cheerio.load(html);이제 $를 통해서 html을 cheerio에서 로딩할 수 있다.
전에는 첫 번째 로딩이 끝난 후 'life'파일 중간에 '로딩 중...'텍스트만 있었다. 이번에도 그런지 확인해보자. mArticle에는 페이지 내에 모든 텍스트를 가지고 있는 요소이다.
  const $ = cheerio.load(html);
  const mArticleText = $('#mArticle').text(); // 태그 내 텍스트 얻기
  console.log(mArticleText)
})();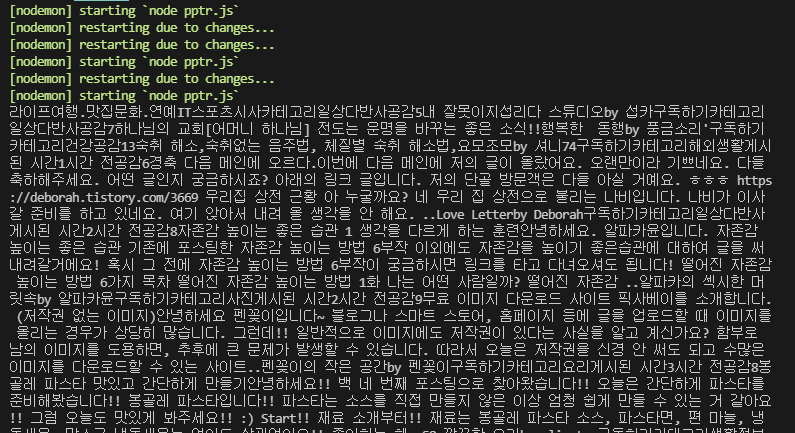
이번에는 로딩 중... 만 뜨는 게 아니라 모든 데이터가 모두 뜬다.
▪ 게시글의 제목과 anchor 태그에 있는 href 가져오기
const puppeteer = require('puppeteer');
const cheerio = require('cheerio');

(async () => {
  const browser = await puppeteer.launch({
      headless: false
  });
  const page = await browser.newPage(); // 새로운 페이지 생성
  await page.setViewport({
      width: 1440,
      height: 1080
  });
  await page.goto('https://www.tistory.com/category/life'); // 사이트 이동
  const html = await page.content(); // puppeteer를 이용하여 페이지의 html파일 가져오기
  const $ = cheerio.load(html);

  let hrefArray = [];
  $('ul.list_tistory > li > a').each((index, element) => {
    const href = $(element).attr('href');
    hrefArray.push(href);
  }); // href 가져오기
  console.log(hrefArray)
  await browser.close(); // 브라우저가 계속 열리는 게 불편한 경우.
})();
- 결과
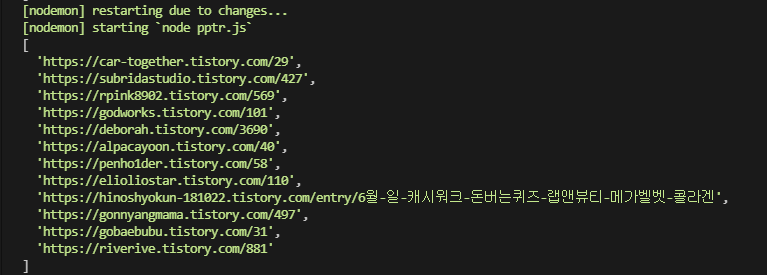
하이퍼링크들을 잘 수집한 것을 확인할 수 있다.
이제 게시글 제목을 가져오자.
const title = $(element).find('.inner_desc_tit');.find() 메서드는 element 아래에 있는 요소를 찾을 때 사용한다.
- 전체 코드
const puppeteer = require('puppeteer');
const cheerio = require('cheerio');

(async () => {
  const browser = await puppeteer.launch({
      headless: false
  });
  const page = await browser.newPage(); // 새로운 페이지 생성
  await page.setViewport({
      width: 1440,
      height: 1080
  });
  await page.goto('https://www.tistory.com/category/life'); // 사이트 이동
  const html = await page.content(); // puppeteer를 이용하여 페이지의 html파일 가져오기
  const $ = cheerio.load(html);

  let hrefArray = [];
  $('ul.list_tistory > li > a').each((index, element) => {
    const href = $(element).attr('href');
    const title = $(element).find('.inner_desc_tit').text();
    hrefArray.push({
        href,
        title
    });
  });
  console.log(hrefArray)
})();
- 결과
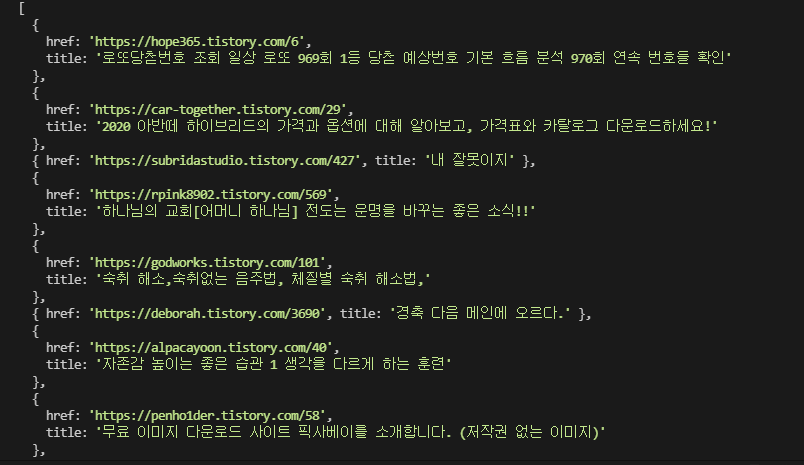
하이퍼링크에서 하위 하이퍼링크를 검색하고, 그 하위 하이퍼링크에서 또 검색하는 것을 반복하려면, href 주소를 탐색하도록 재귀함수를 만들면 된다.
const puppeteer = require('puppeteer');
const cheerio = require('cheerio');

// 하나의 페이지 안에 있는 하이퍼링크를 수집하고 재검색하는 함수
const crawling = async (href) => {
  const browser = await puppeteer.launch({
      headless: false
  });
  const page = await browser.newPage(); // 새로운 페이지 생성
  await page.setViewport({
      width: 1440,
      height: 1080
  });
  await page.goto('https://www.tistory.com/category/life'); // 사이트 이동
  const html = await page.content(); // puppeteer를 이용하여 페이지의 html파일 가져오기
  const $ = cheerio.load(html);

  let hrefArray = [];
  $('a').each((index, element) => {
    const href = $(element).attr('href');
    hrefArray.push(href);
  });
  hrefArray.forEach(item => {
    crawling(item.href);
  })
};

crawling(''); // 크롤링을 시작하는 Seeds사이트 하나 넣기
하지만 이렇게 하면 href가 정확하게 명시되어 있지 않은 경우에 심각한 문제가 발생한다.
만약 Seeds 페이지 내에 Seeds 페이지로 돌아가는 href가 있다면 재귀되는 문제가 발생한다. 따라서 Seeds 페이지와 동일한 href는 모두 제외하여야만 정상적인 크롤링을 작동할 수 있게 된다.
혹은 찾을 수 없는 페이지가 하이퍼링크로 걸려있는 경우에는 해당 사이트가 뜰 때까지 계속해서 기다리게 된다.
이것을 딜레이를 적용하지 않고 무제한으로 적용하여 기다리게 된다면 컴퓨터가 멈춰버리게 된다.
Puppeteer로 크롤링을 만들 수는 있다. 하지만 위와 같은 문제들이 발생할 수 있기 때문에 낮은 레벨의 크롤링을 하는 것이 좋다.
'Back-End > Node.js' 카테고리의 다른 글
| NPM과 NPX (0) | 2021.06.10 |
|---|---|
| readFile(비동기)와 readFileSync(동기)의 차이 (0) | 2021.05.16 |
| JavaScript / Node.js / Express.js (0) | 2021.04.25 |
| 모듈/패키지/라이브러리/프레임워크/플랫폼/API 용어의 의해 (0) | 2021.04.25 |
| 시퀄라이즈(Sequelize) (0) | 2021.04.12 |
