깃허브
(1) 개발자들의 SNS
stars
좋아요 누른 프로젝트 목록
많은 star를 받은 프로젝트는 개발자의 큰 경쟁력이 된다.
issue
버그 제보 및 앞으로 개발해야 할 것들을 명시하는 곳
(2) 원격 저장소 호스팅 서비스
원격 저장소?
컴퓨터 속에만 있는 저장(로컬 저장소)가 아닌,
인터넷 세상 어딘가(원격)에 있는 다른 컴퓨터 속의 저장소
- 깃허브가 관리하는 원격 저장소에 프로젝트를 업로드하면 백업이 용이해짐.
README.md
프로젝트 설명서
깃허브와 소스트리 연동하기
SSH (Secure Shell)
깃허브와 우리 컴퓨터가 안전하게 통신을 주고 받을 수 있는 방법
SSH 통신으로 깃허브와 통신하는 방법
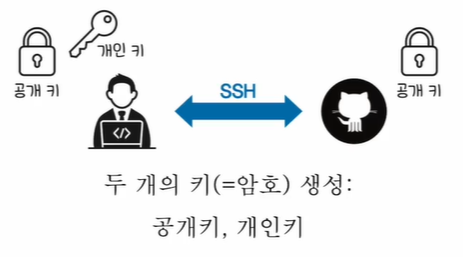

- 두 개의 키(=암호. 무작위의 긴 문자열) 생성한다.
- 공개 키
- 개인 키
- 깃허브에게 공개 키를 넘긴다.
- 그러면 깃허브와 SSH 통신이 가능하다!
깃허브로 전달할 메시지를 개인 키를 이용해서 암호화하고(다른 사람들이 가로채도 읽지 못함), 깃허브는 공개 키로 우리가 보냈음을 식별할 수 있다.
깃허브와 소스트리 연동하기
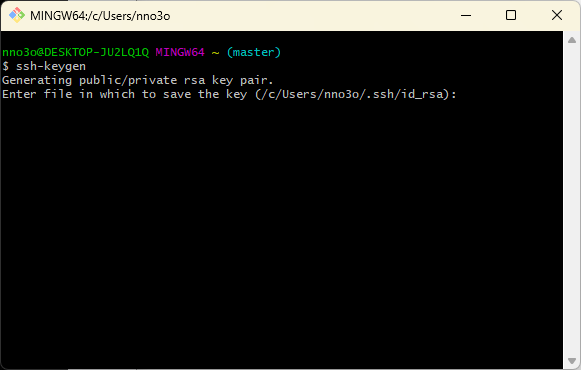
SSH 통신을 위해 공개 키와 개인 키 생성하기
git bash 터미널에서 다음 명령어를 입력한다.
ssh-keygen키를 어느 경로에 저장할 것인지 입력한다. (보통 기본 경로에 저장)

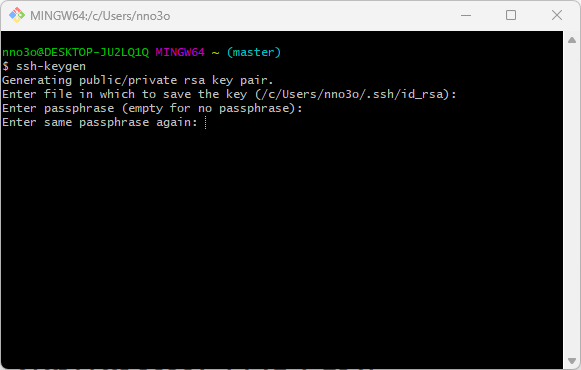
SSH 통신하기 직전에 암호 설정(필요하면 입력, 아니면 그냥 엔터 입력)

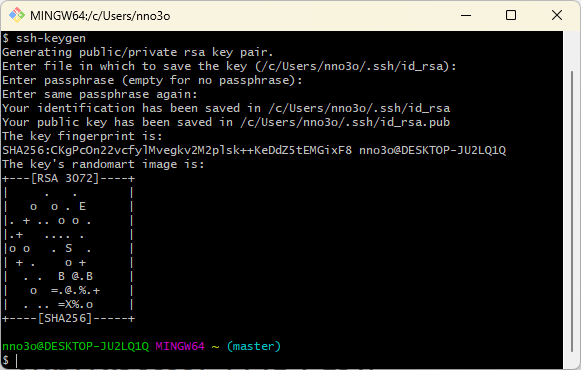
/c/Users/nno3o/.ssh/id_rsa 경로에 우리의 개인 키가 생성되었고,
/c/Users/nno3o/.ssh/id_rsa.pub 경로에 우리의 공개 키가 생성되었다.

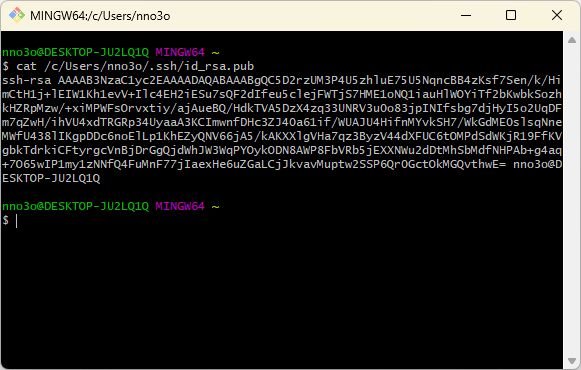
- **cat** : 특정 파일을 열어보는 리눅스 명령어
cat /c/Users/nno3o/.ssh/id_rsa.pub이 무작위 문자열이 공개 키다. 이 값을 깃허브에게 전달해주면 이제 깃허브와 우리 컴퓨터가 안전하게 정보를 주고 받을 수 있다.

깃허브에 공개 키 설정하기
깃허브 > settings > SSH and GPG keys > New SSH keys > 입력 후 Add SSH Key
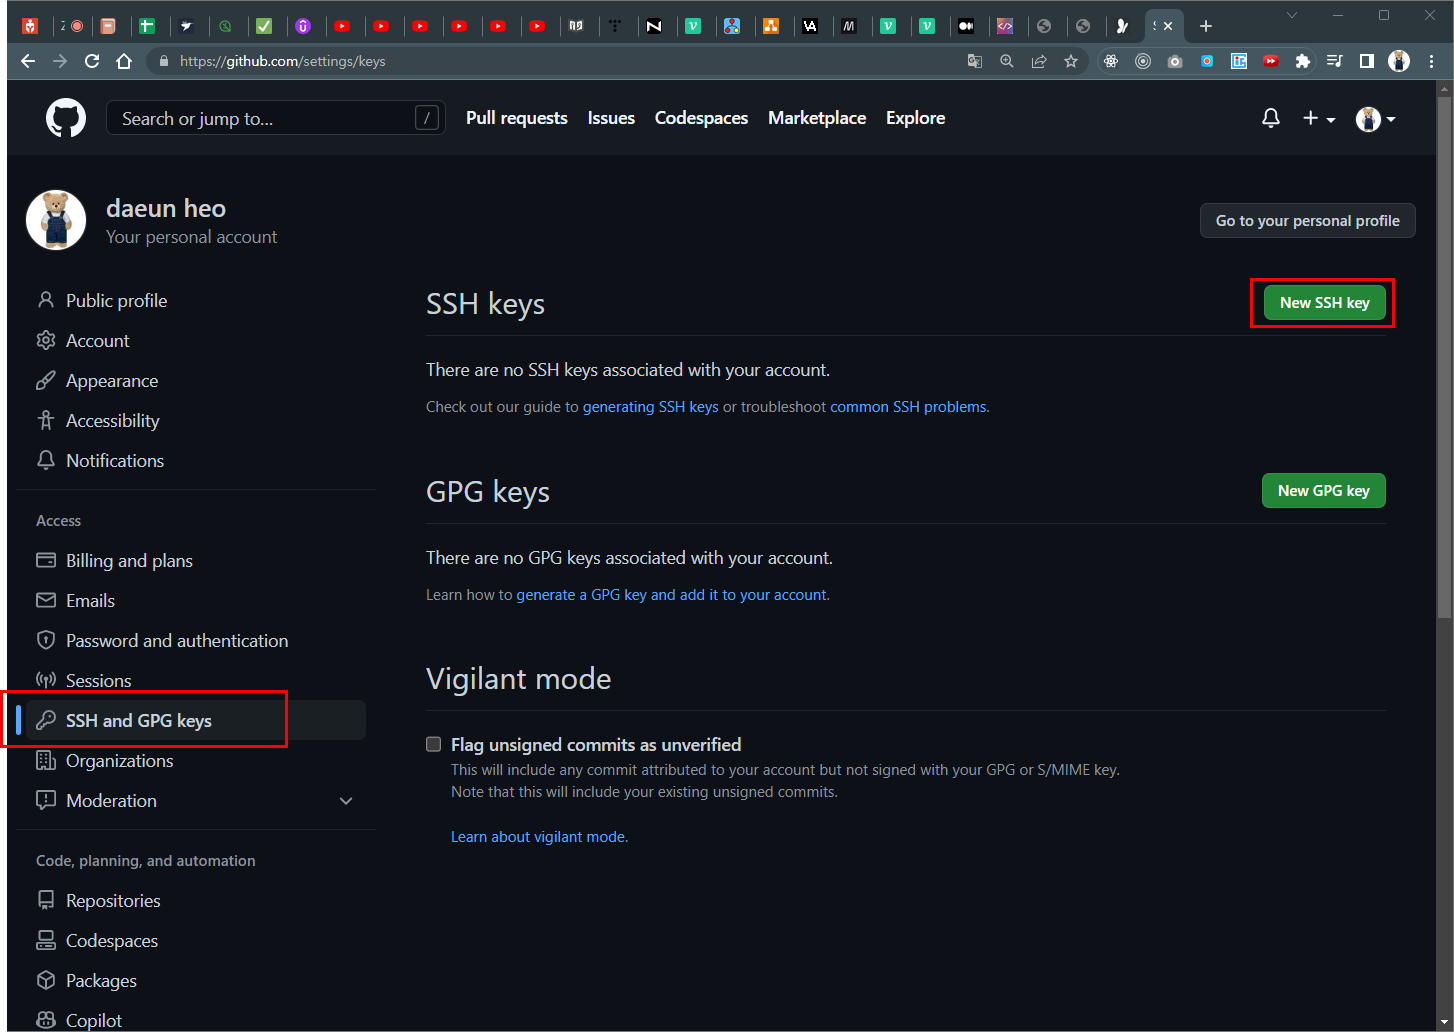


- Title : 이름 지정(ex. my windows laptop)
- Key : 공개 키를 복사하고 붙여넣기
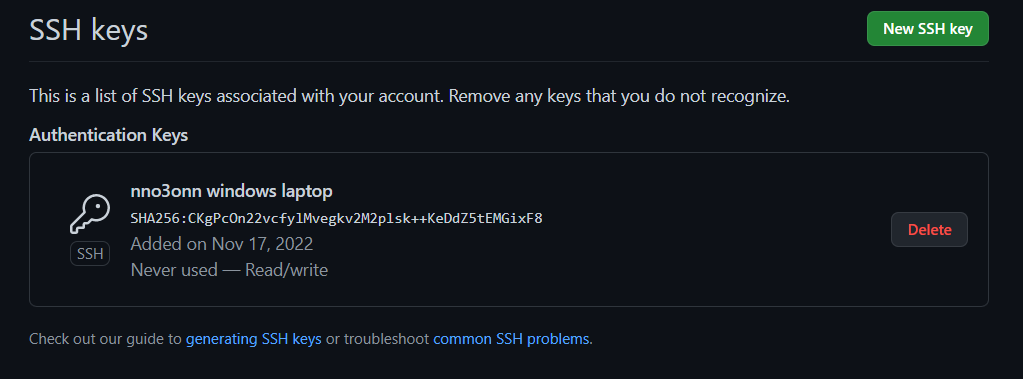

생성 완료!
소스트리 설정하기
도구 > 옵션 > SSH 클라이언트 설정 > SSH 클라이언트 : OpenSSH 설정 (경로 자동 설정됨) > 확인
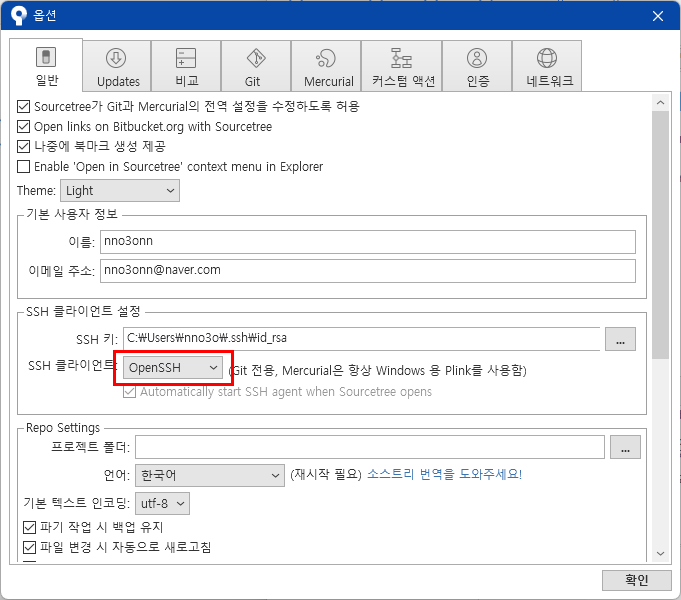

그러면 SSH 연동 완료!
소스트리에 깃허브 계정 연결하기
Remote > 계정 추가

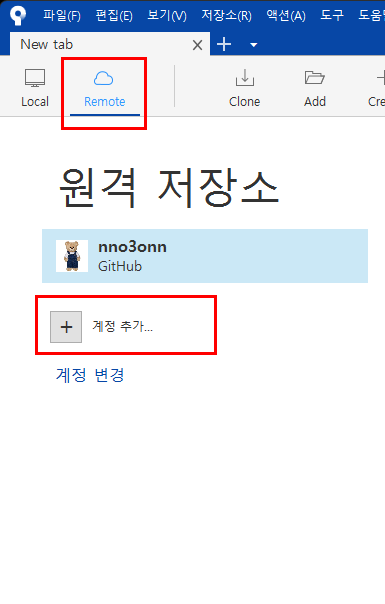
- 호스팅 서비스 : **GitHub** 설정
- 선호 프로토콜 : **SSH**
- **OAuth 토큰 새로고침** 클릭 > **Authorize atlassian**
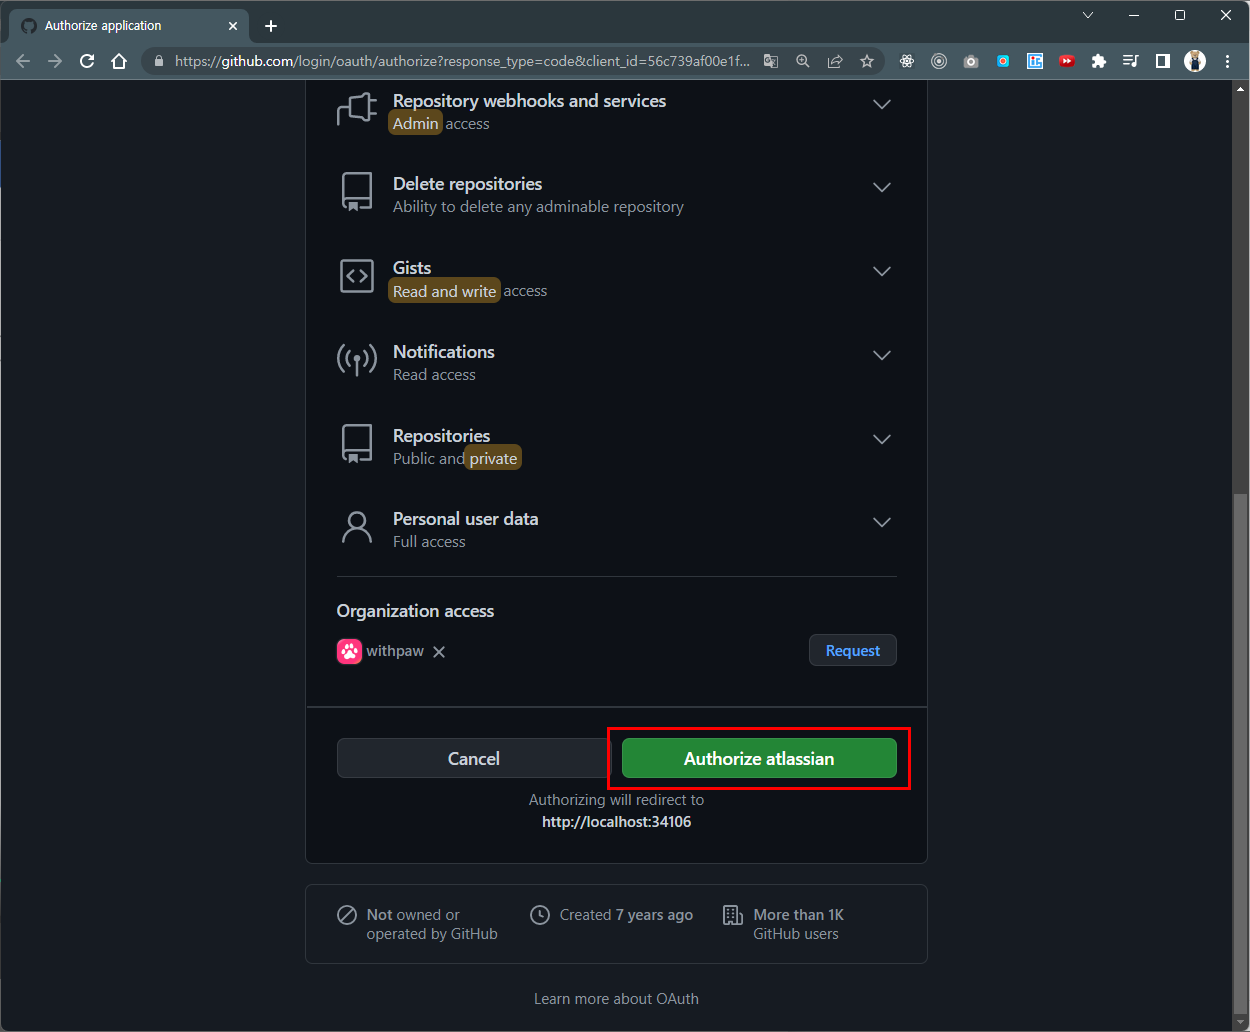

연결 완료!
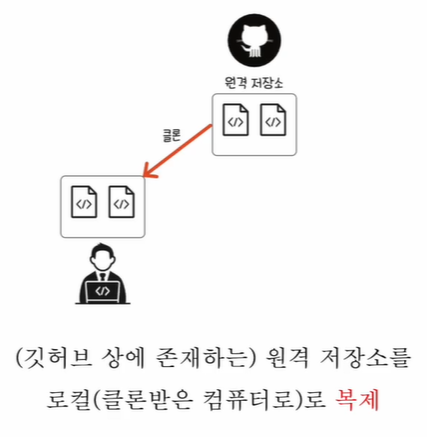
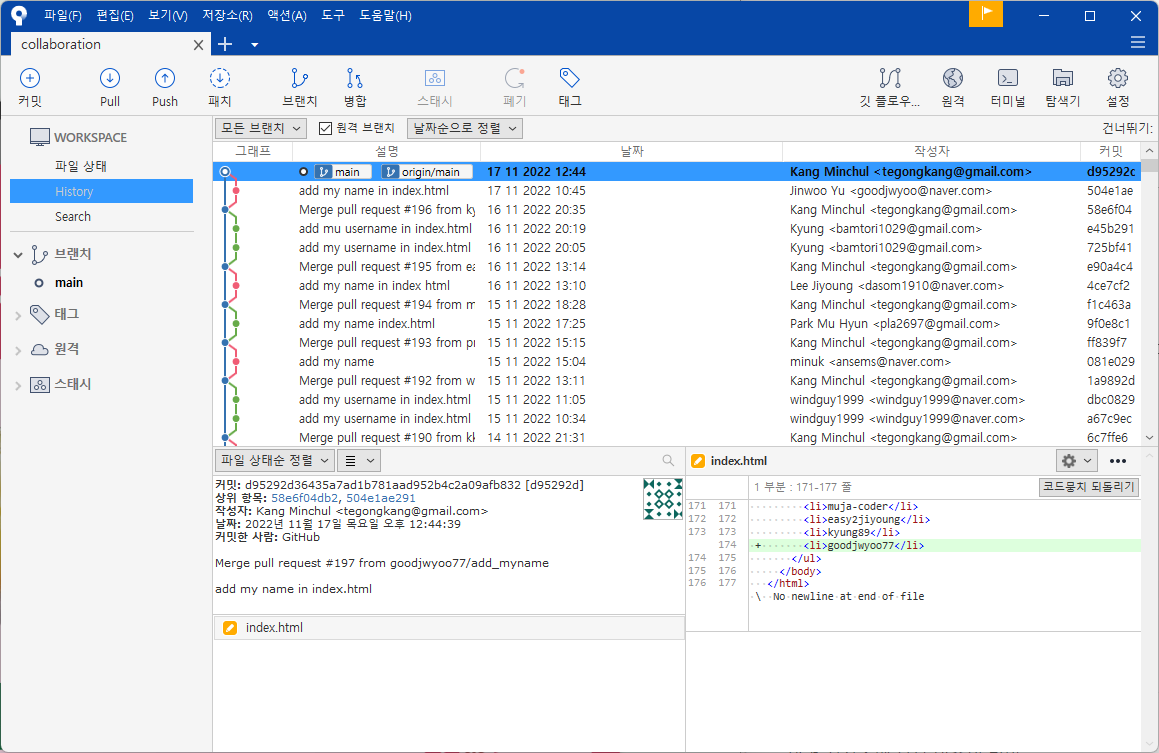
원격 저장소와의 네 가지 상호 작용
- 클론(clone) : 원격 저장소를 복제하기
- 푸시(push) : 원격 저장소에 밀어넣기
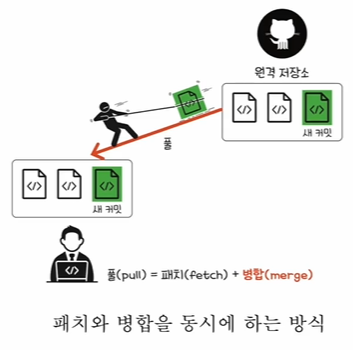
- 패치(fetch) : 원격 저장소를 일단 가져만 오기
- 풀(pull) : 원격 저장소를 가져와서 합치기
(1) clone: 원격 저장소 복제하기

소스트리로 해보기
내 레포지토리 클론하기


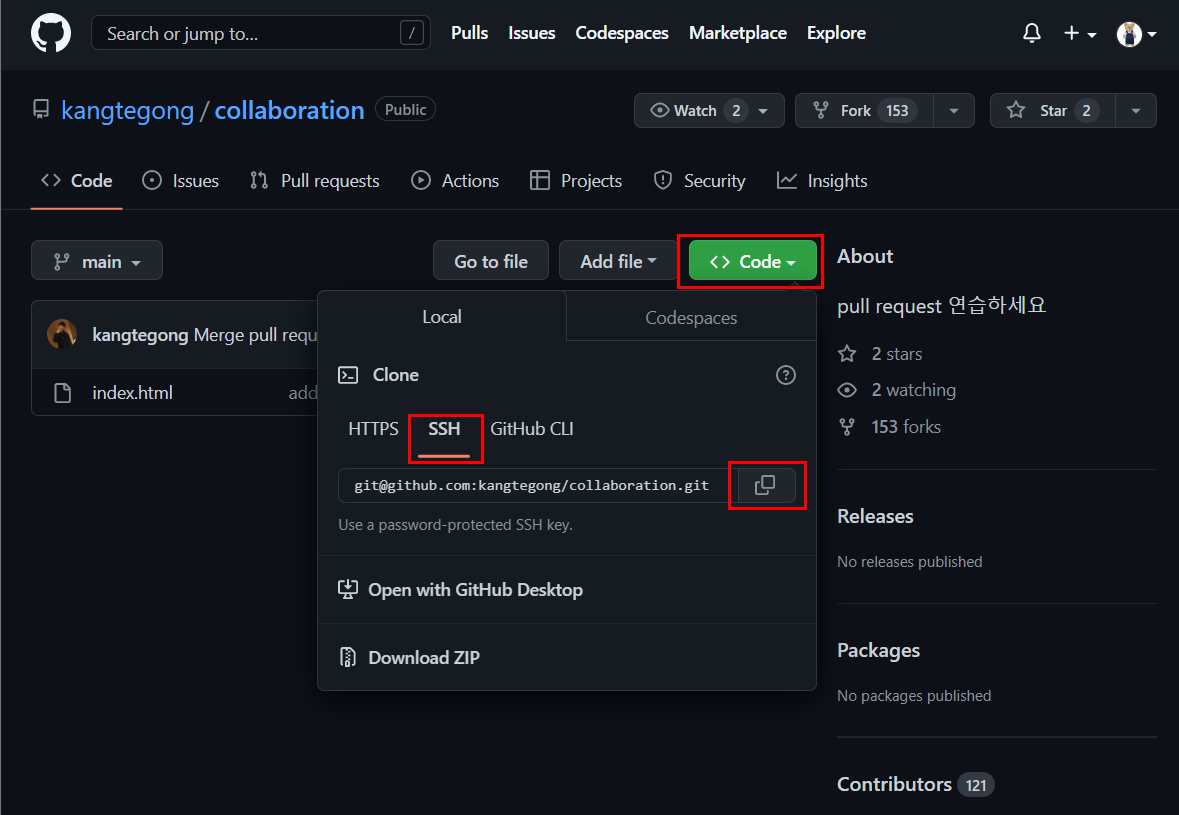
다른 레포지토리 클론하기
Code > SSH > 복사
- 소스트리는 깃허브와 SSH 통신을 하므로 SSH를 클릭해야 한다.

Clone > 저장소 붙여넣기 > 클론
- 'Git 저장소 입니다' 라고 떠야 정상이다.


- 히스토리까지 다 복제된다.
- .git 폴더까지 같이 복제된다.

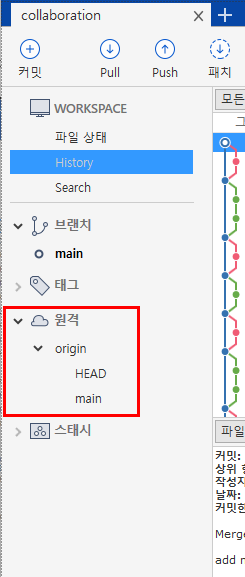
원격 저장소 브랜치 이름
- **main 브랜치** == master 브랜치
- **origin** == 원격 저장소에 붙은 일종의 별명
- 설정 > 이름 / 경로
- 별명이기 때문에 다른 이름으로 변경할 수 있다.
- **origin/HEAD** == 원격 저장소 origin의 HEAD
- **origin/main** == 원격 저장소 origin의 main
원격 저장소에도 HEAD와 main이 있다.
현재 경우에는 main 브랜치 == origin/main == origin/HEAD 모두 같은 곳을 가리키고 있다.

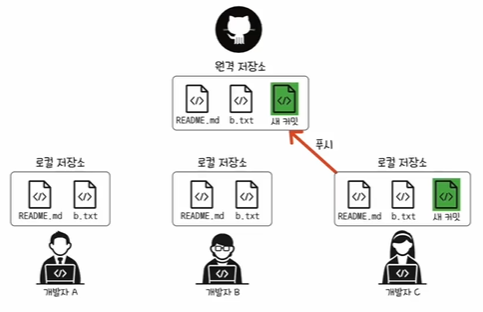
(2) push: 원격 저장소에 밀어넣기


로컬 저장소의 변경사항을 원격 저장소에 반영한다.
소스트리로 해보기
우리가 소유한 레포지토리만 push할 수 있다.
- 레포지토리 생성
- 소스트리에 레포지토리 클론
- 파일 생성 및 커밋
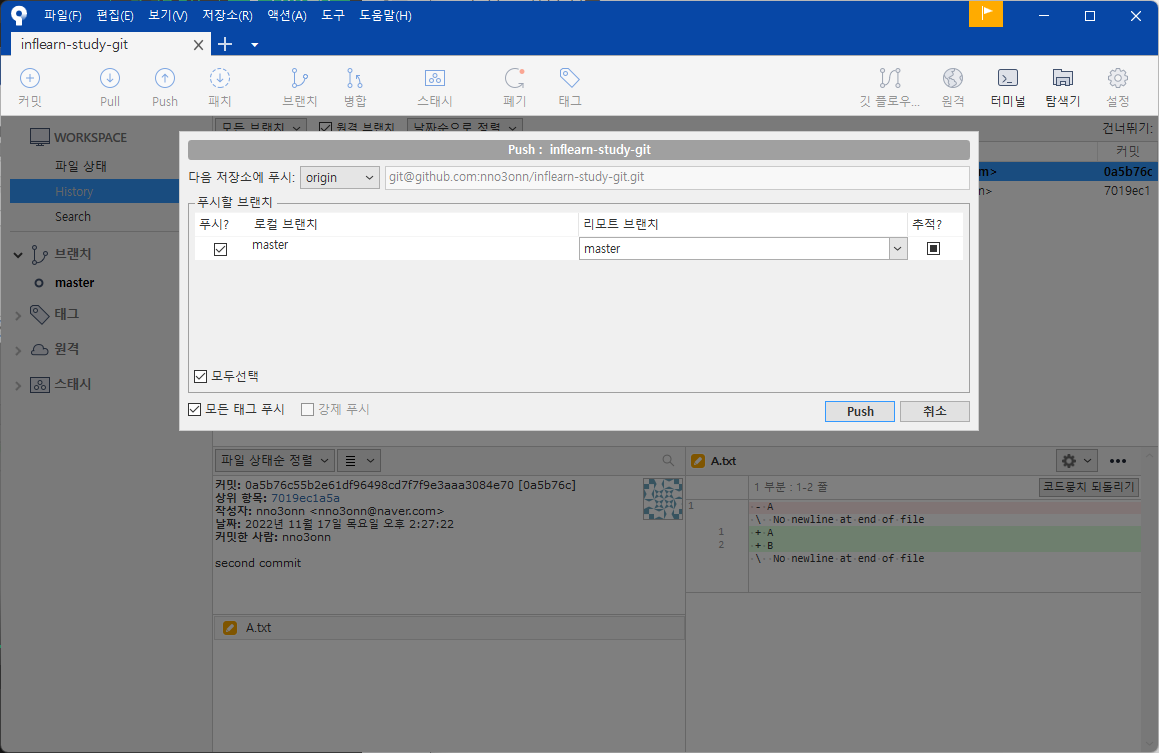
Push
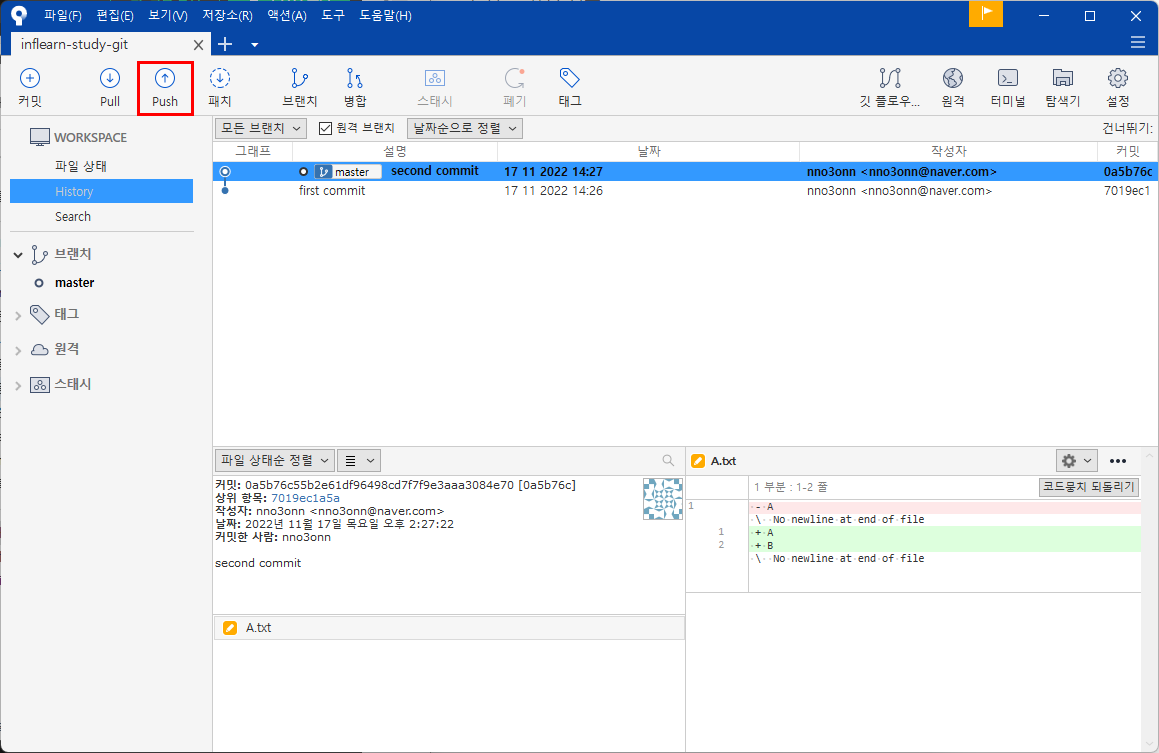

push 버튼 클릭
- master 브랜치에 push 하겠다는 의미

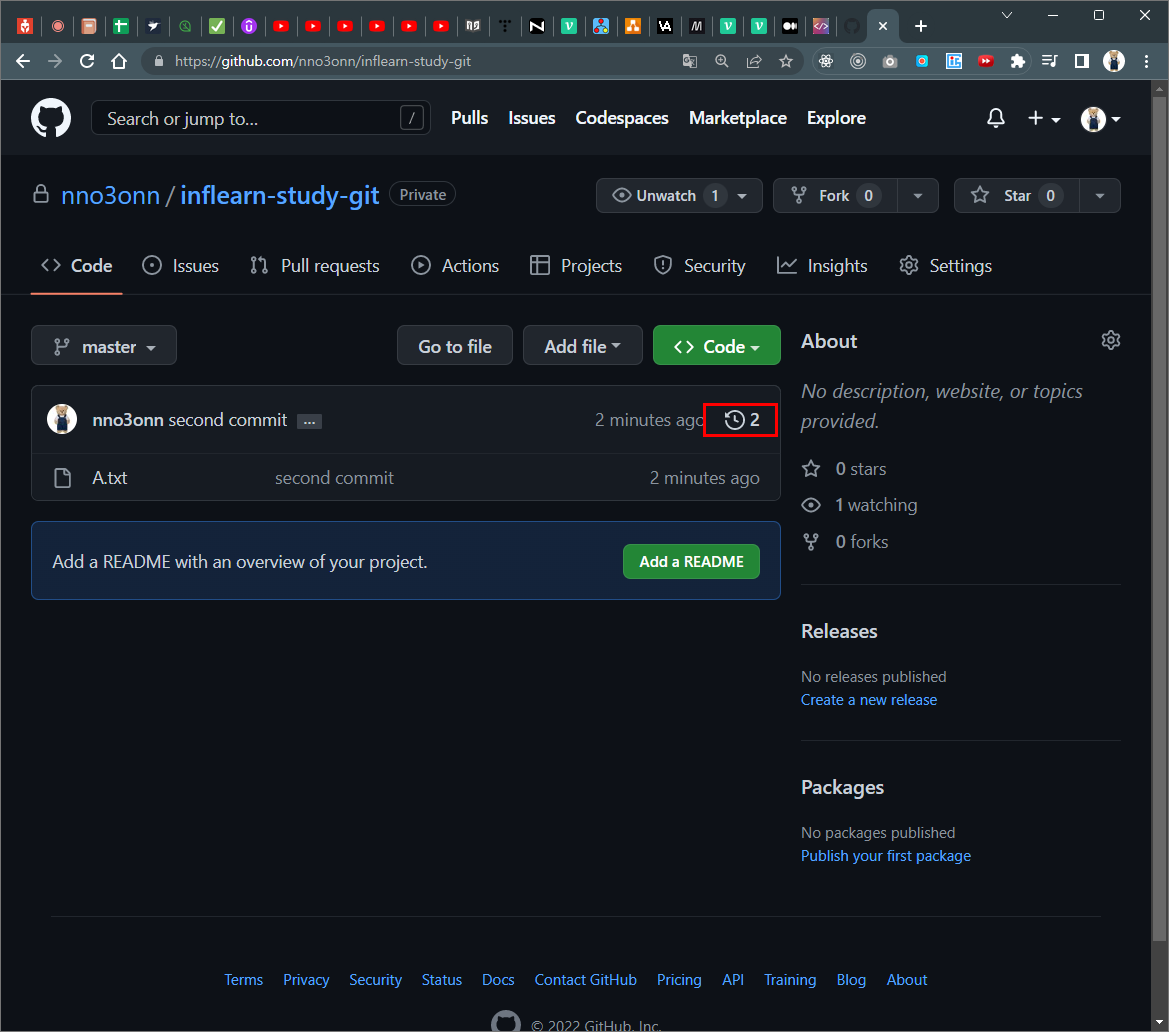
레포지토리에 잘 반영되었다 (2 commits).

이미 커밋한 것들을 원격 저장소에 연결하여 한꺼번에 올리려면?
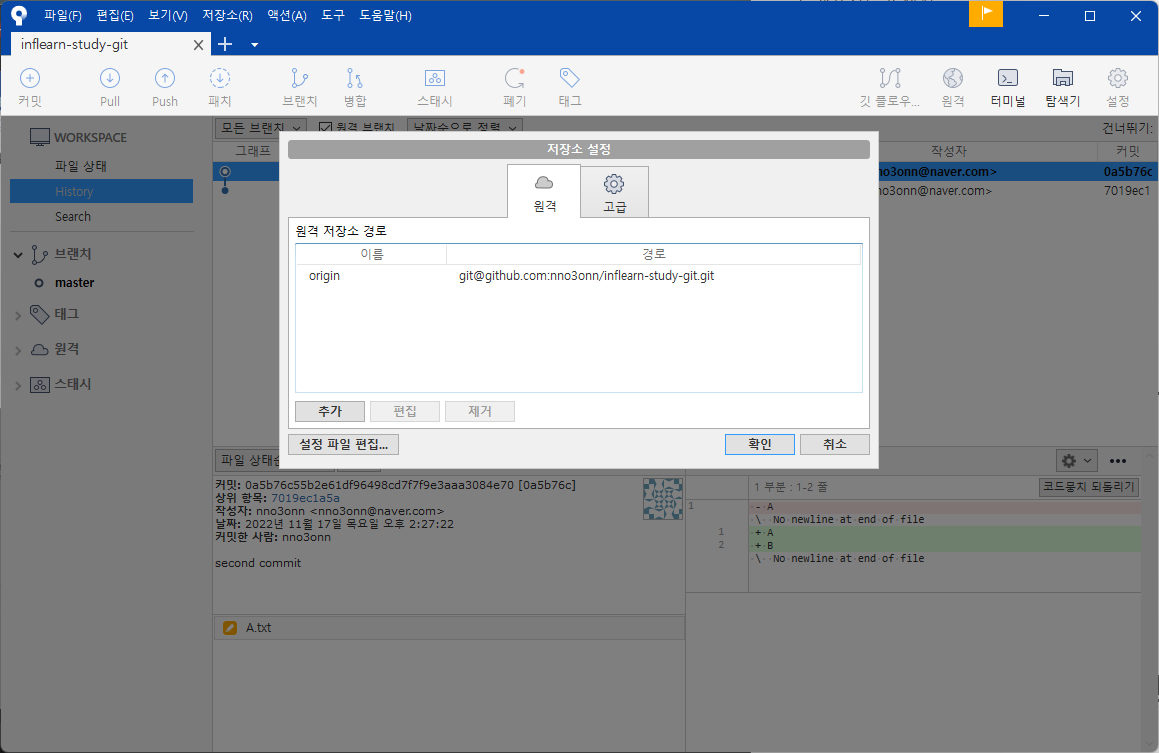
설정 > 추가
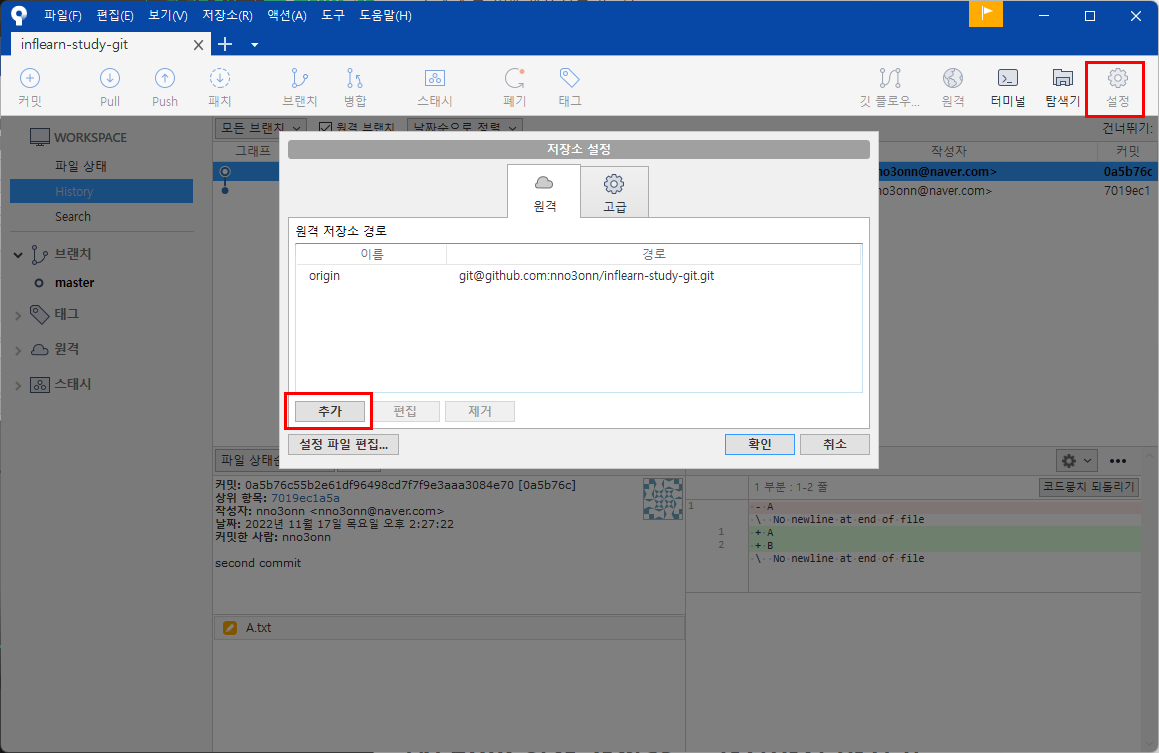

값 입력 > 확인
- 원격 이름: 경로의 별명
- URL/경로 : 깃 SSH 복사한 것
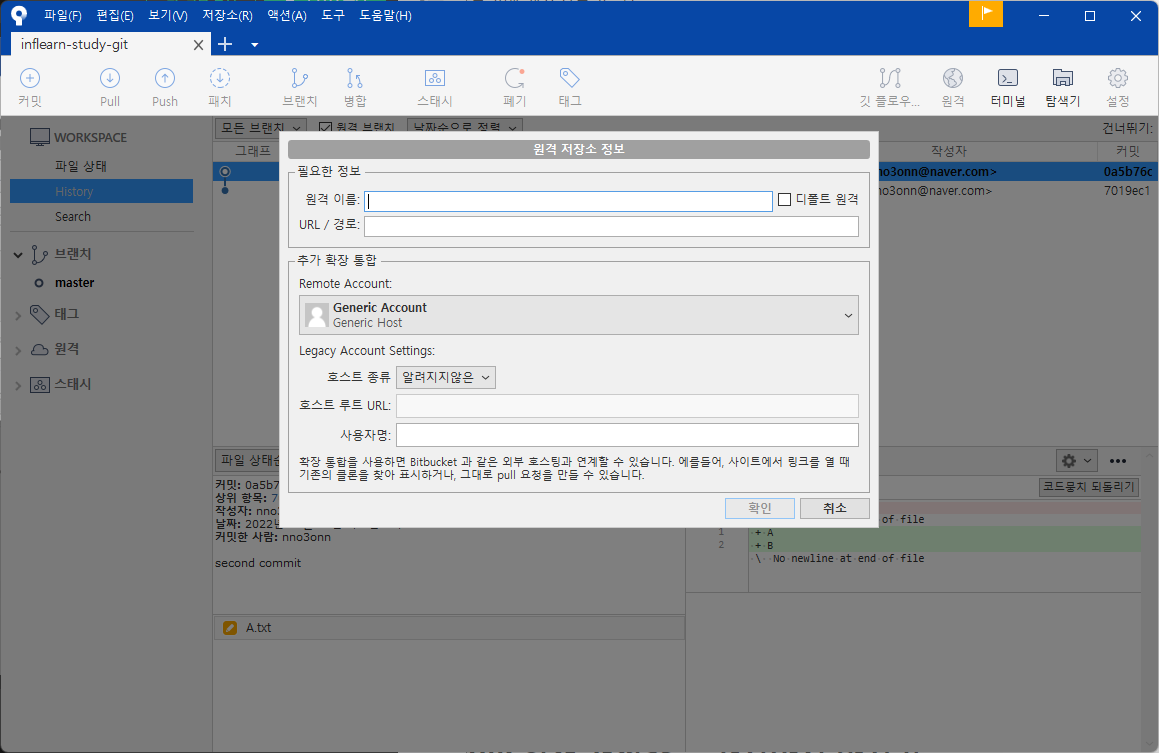

앞으로 경로는 origin이라는 이름으로 짧게 부를 수 있다(origin으로 상호작용 가능).

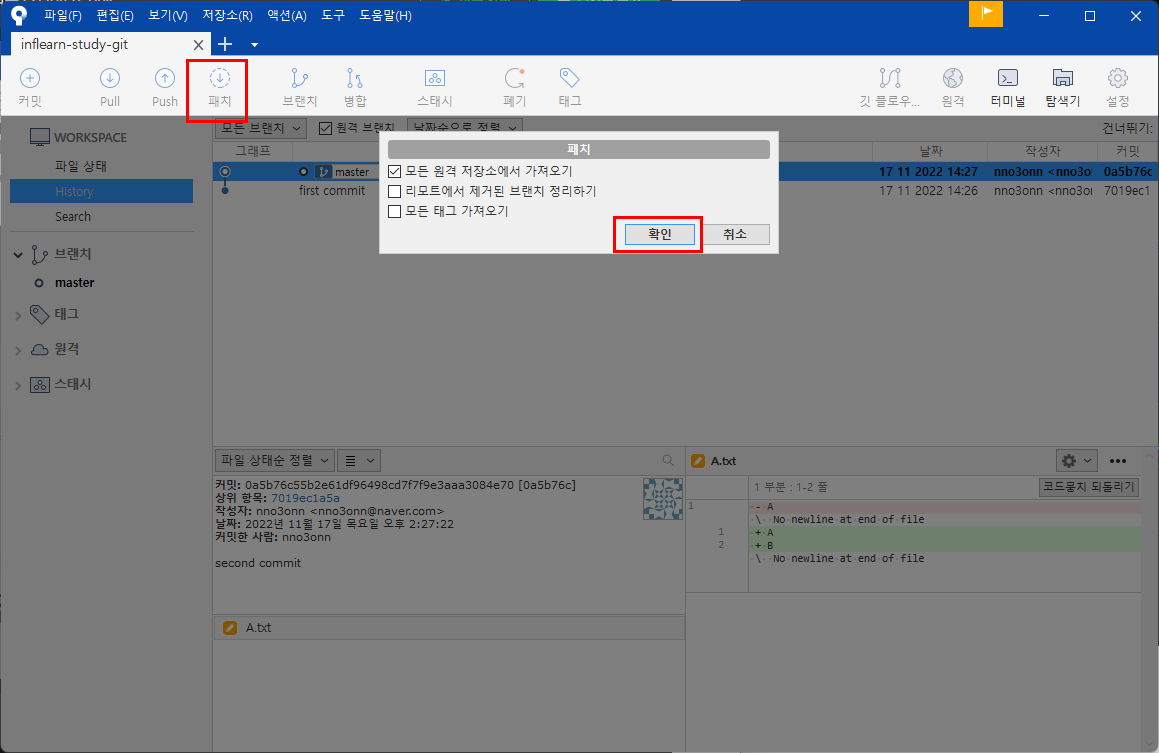
(3) fetch: 원격 저장소를 일단 가져만 오기
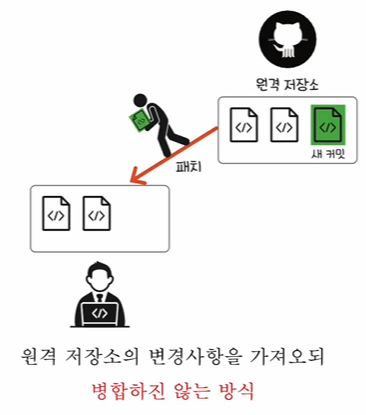

나는 그대로인데 원격 저장소만 변경된 경우, 변경사항을 받아만 오고 내가 한 작업(로컬 저장소)에는 영향을 주지 않음
(상황)

소스트리로 해보기
위의 상황을 만든다. (깃에서 원격 저장소 내용 수정함)


소스트리에서 fetch 하기
fetch > 확인
- master브랜치(로컬 저장소)
- origin/master브랜치에만 원격 저장소의 변경사항 가져옴
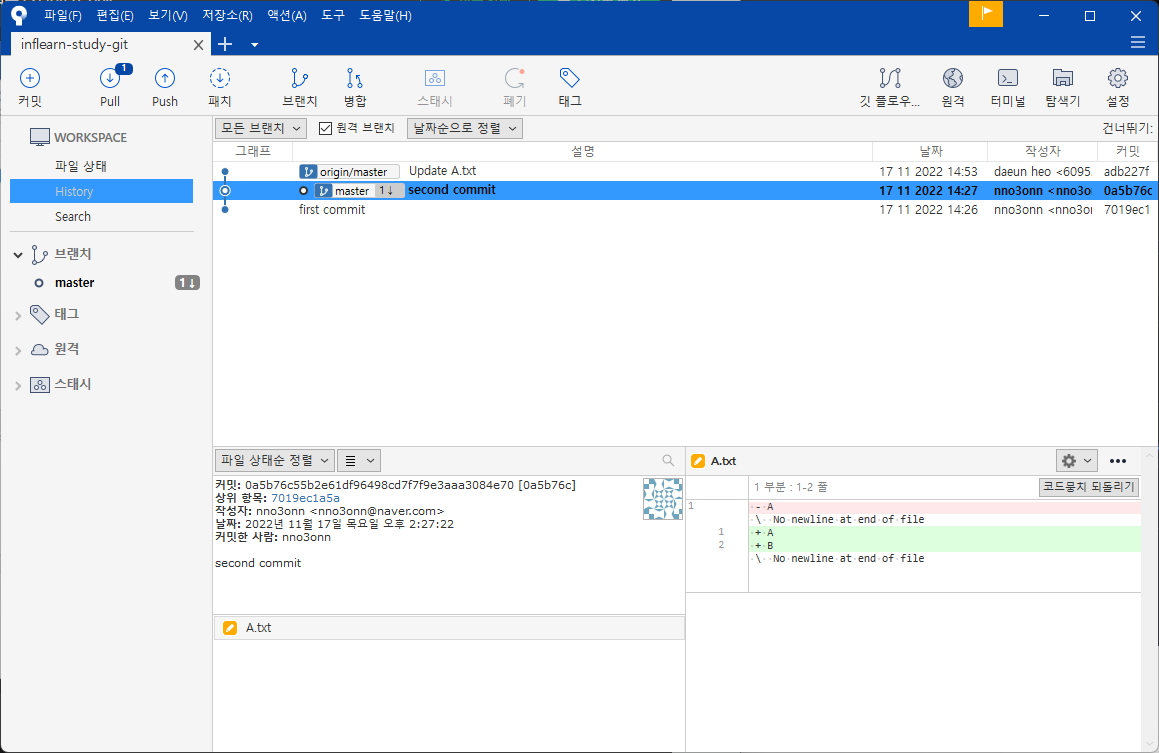

현재는 master브랜치에 있으므로 폴더 내에서는 "A B" 내용만 담고 있지만, 커밋 내용을 통해 origin/master의 변경사항을 볼 수 있다.
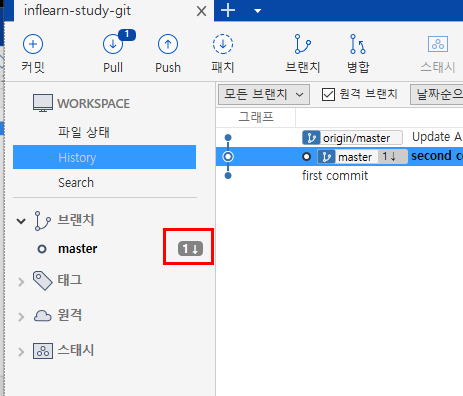

origin/master브랜치보다 master브랜치가 한 단계 더 뒤쳐진 상태임
변경 사항을 master 브랜치에 가져오려면 pull을 해서 병합하면 된다.

병합 완료
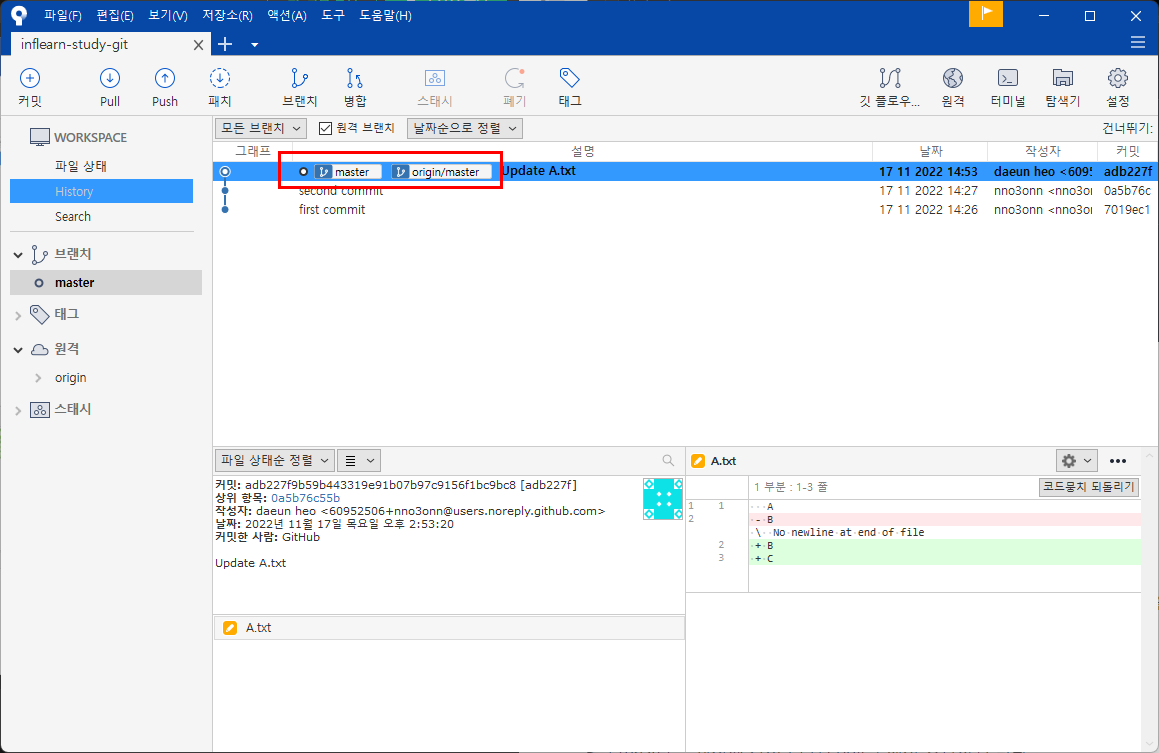

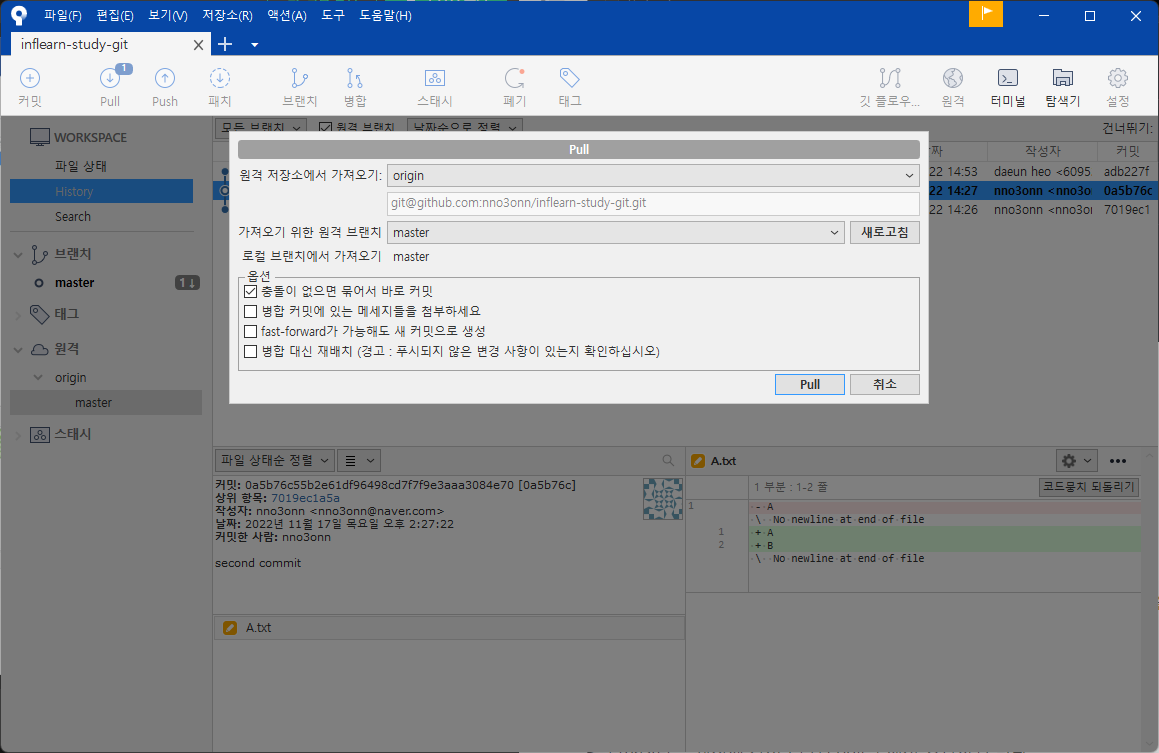
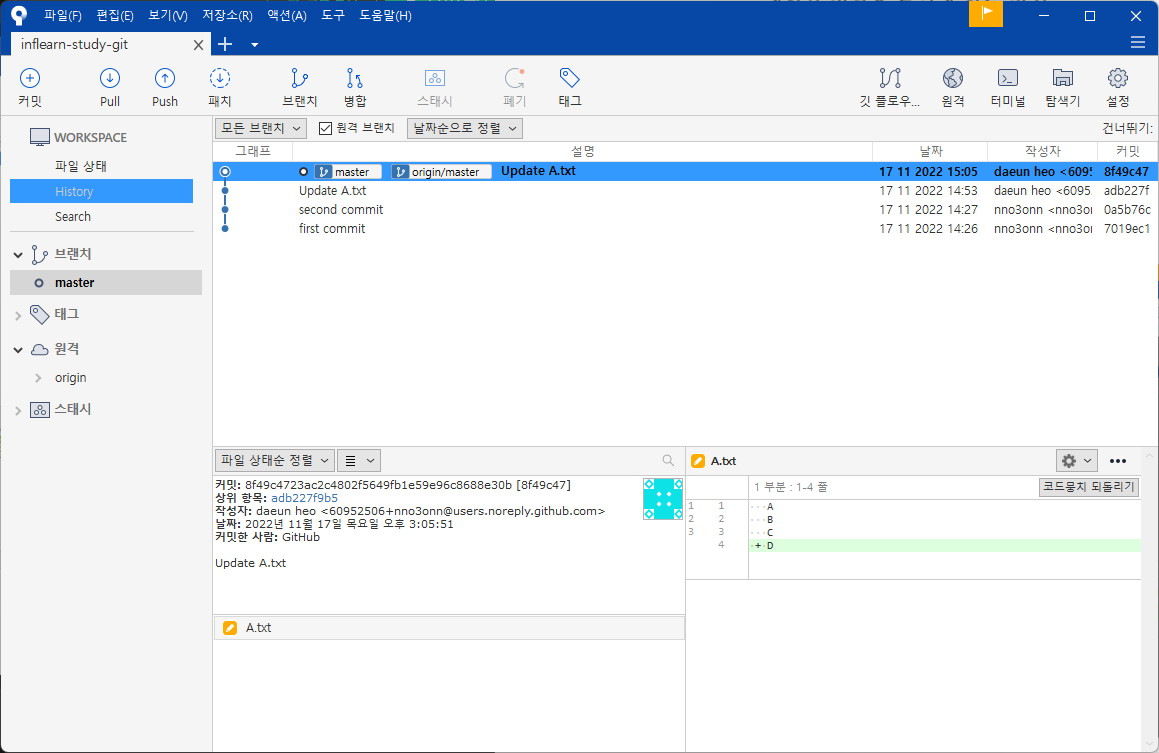
(4) pull: 원격 저장소를 가져와서 합치기
원격 저장소로부터 변경 사항을 갖고 오고 내 로컬 저장소에 바로 적용함

소스트리로 해보기
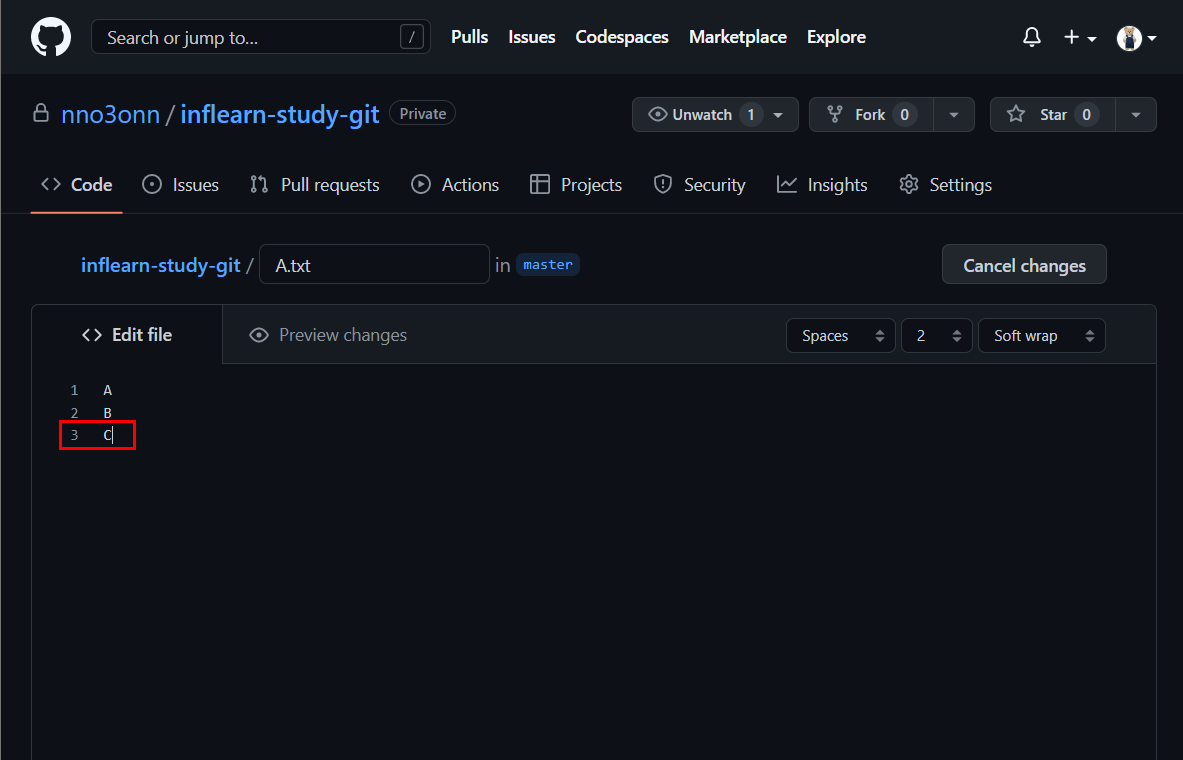
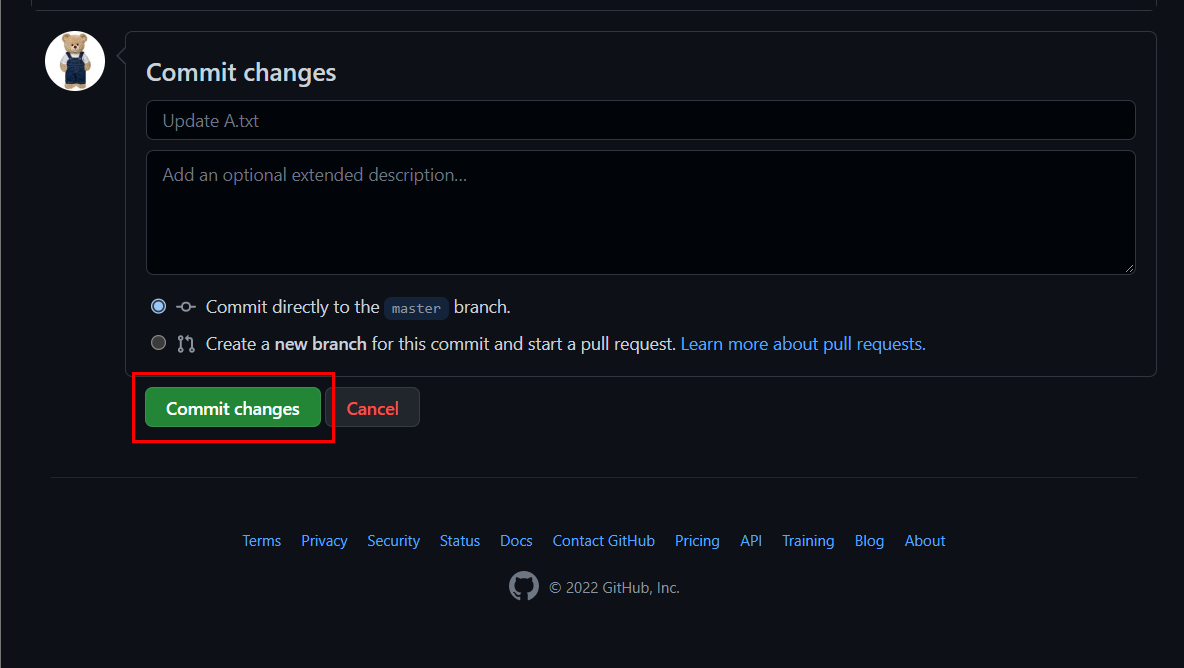
깃으로 파일 내용을 변경하고 커밋한 후, 소스트리에서 pull해보자.
Pull > Pull 버튼 클릭


변경 사항이 내 로컬 저장소에 바로 합쳐진다.

'Github' 카테고리의 다른 글
| 07_명령어로 깃 다루기 (0) | 2022.11.17 |
|---|---|
| 06_02_깃허브로 협업하기: Pull Request (0) | 2022.11.17 |
| 05_브랜치로 나누어 관리하기 (0) | 2022.11.16 |
| 04_버전 가지고 놀기 (0) | 2022.11.16 |
| 03_버전이 쌓여 사용자에게 선보이기까지: 커밋해시, 태그 (0) | 2022.11.15 |


