학습 리스트
- 개발환경
- tag
- list와 style
- image, 유튜브 불러오기
- input form
- table과 style
- meta tag
- lorem의 또다른 기능
- HTML 5의 구조
- 블록 레벨과 인라인 레벨
개발 환경
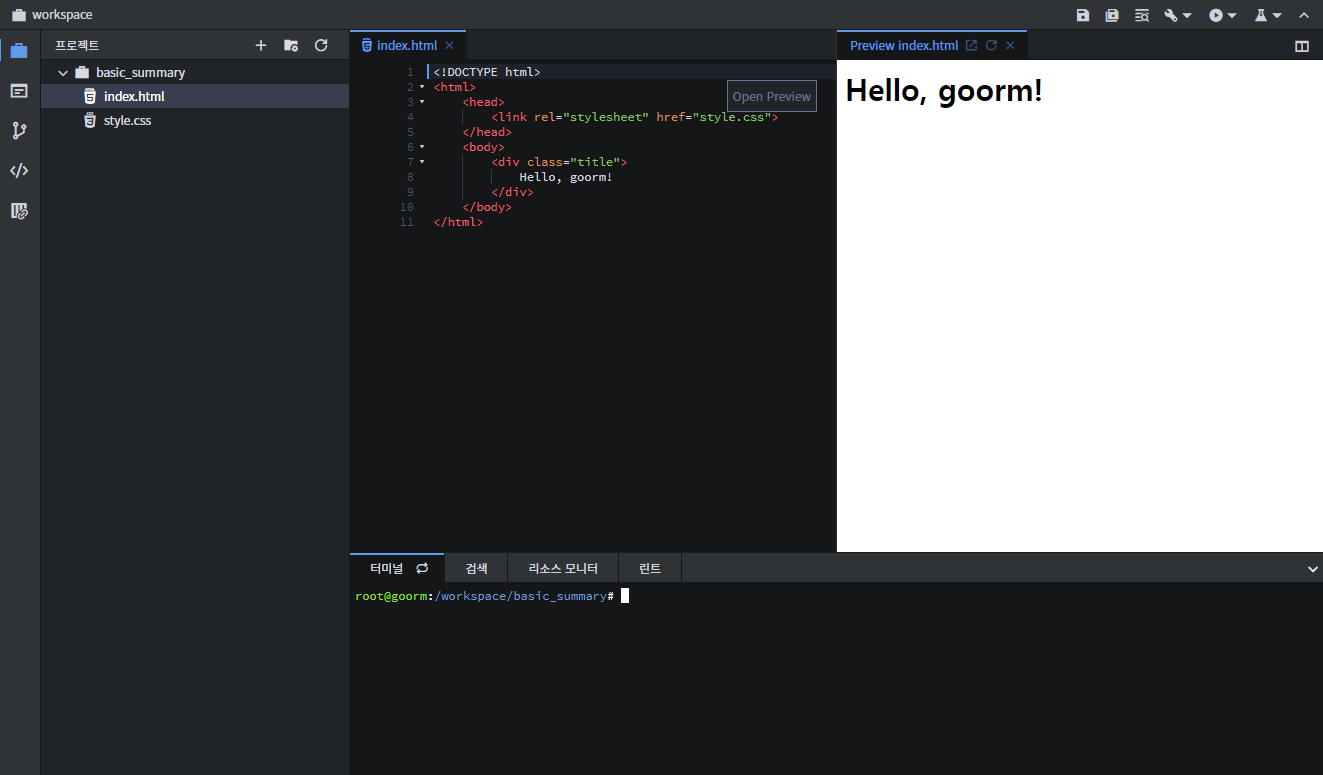
파이썬에서와 동일하게 구름IDE에서 새 컨테이너를 생성한다. 전과 다른 점은 '소프트웨어 스택 선택'을 할 때 'HTML/CSS/JS'로 선택한다. 실행 후, html 파일을 열고 "Open Preview"를 누르면 아래와 같이 작성한 코드를 바로 결과로 볼 수 있다.
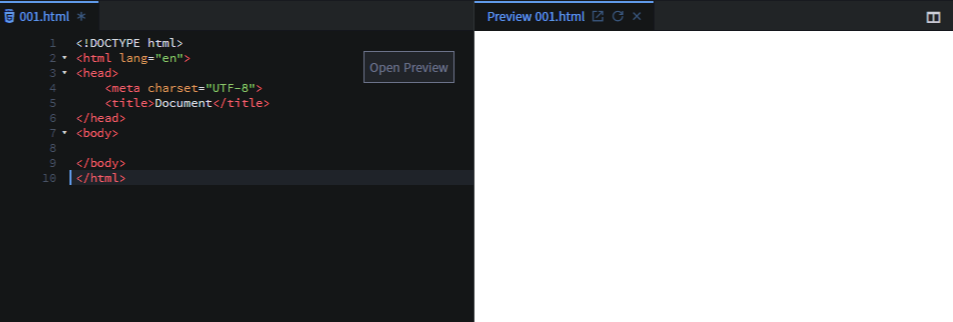
새 파일을 만든 후, "! tab"을 누르면 아래와 같이 기본 코드가 작성된다.
1. Tag
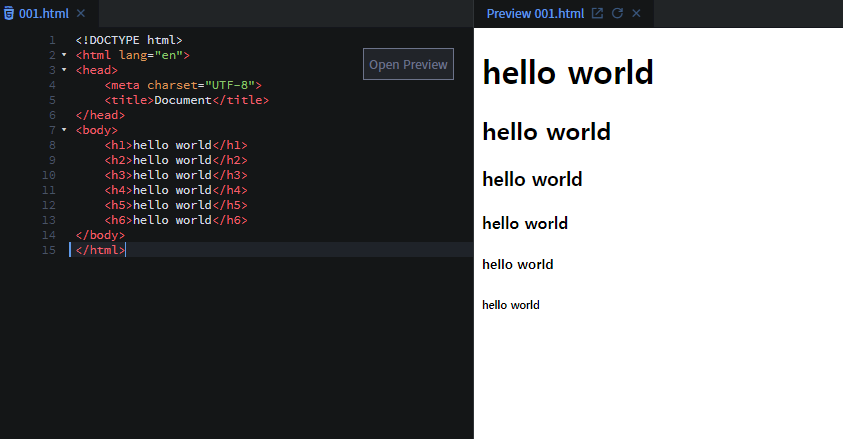
- <h1>: 헤드. h1부터 h6까지 있다.
- <p>: 문단. paragraph
✔︎ 공백이 있어도 HTML에서는 병합되기 때문에 반영되지 않는다. 따라서 공백을 반영시키기 위해서는 "tag"를 사용해야 한다.
<p>hello<br>world</p>- <br> : 띄어쓰기
- <hr> : 수평선 긋기
- lorem + tab : 의미없는 글귀 생성
- <b>: 문자 강조(bold)
- <strong> </strong> : 권고사항(<b>태그와 동일한 출력)
<b>와 <strong>의 차이점?
<b>는 HTML 5 이전에 나왔다. 현재 HTML 5 버전이므로, 음성지원을 할 때 strong을 강조해서 읽는다. 그래서 요즘은 <b>보다는 <strong>을 사용하는 편이다.
- <i>: 기울임(italic). HTML 5 이전의 태그.
- <em> : 기울임. 최근에 나온 태그. 따라서 <i>보다 <em>을 권장함.
- <mark>: 형광펜 효과
- <sub>: 밑첨자
- <sup>: 윗첨자
(ex)
    <p>H<sub>2</sub>O</p>
    <p>x<sup>2</sup>=4</p>
2. list와 style
- <ol> : ordered list. 순서가 있는 리스트
- type에는 A, a, i 등이 있다. (ex)type="A"
- <ul> unordered list. 순서가 없는 리스트. 리스트 앞을 동그라미로 나타낸다.
- 하지만 주로 옆의 동그라미를 없애고 나란히 배치하여 메뉴로 활용한다.
- <li> : ol혹은 ul 속 리스트
- <dl> : definition list. 정의 목록
- <dt> : definition tongue. 정의 용어
- <dd> : definition description. 정의 설명
- <div> : 내용들을 묶는 용도로 사용. 주로 css를 꾸미기, 위치 꾸미기, 애니메이션을 넣을 경우에 사용한다.
- <style> : <head>속에 작성하여 <body>의 태그 속 내용들을 꾸밀 수 있다. 아래의 코드의 경우 <div>속 내용을 꾸민 것이다.
(예시)
<!DOCTYPE html>
<html lang="en">
<head>
    <meta charset="UTF-8">
    <title>Document</title>
    <!-- 꾸미기 -->
    <style>
        div{
            border: solid 1px black;
        }
    </style>
</head>
<body>
    <!-- order list 순서가 있는 리스트-->
    <ol type = "a">
        <!-- type에는 A, a, i 등이 있다 -->
        <li>hello world</li>
        <li>hello world</li>
        <li>hello world</li>
    </ol>
    <!-- unorder list 순서가 없는 리스트
주로 옆의 동그라미를 없애고 나란히 두어 메뉴로 활용한다-->
    <ul>
        <li>hello world</li>
        <li>hello world</li>
        <li>hello world</li>
    </ul>
    <!-- definition list 정의목록 -->
    <dl>
        <!-- definition tongue 정의용어 -->
        <dt>HTML</dt>
        <!-- definition description 정의설명 -->
        <dd>마크업 언어</dd>
    </dl>
    <!-- 묶어줄 때 사용 -->
    <!-- 묶어서 css를 꾸미거나, 위치를 꾸미거나, 애니메이션을 넣을 경우 사용 -->
    <div>
        <a href="https://naver.com">네이버</a>
        <a href="https://naver.com">네이버</a>
        <a href="https://naver.com">네이버</a>
    </div>
</body>
</html>
3. image, 유튜브 불러오기
<img src="파일이름.png" alt="hello">
파일을 미리 불러온 후 src에 파일이름을 지정한다. alt속에는 이미지 파일이 없을 경우에 띄울 내용이다.

원래 오디오나 비디오를 가져오는 방법도 있지만, 최근에 유튜브 플랫폼이 많이 발전하면서 오디오나 비디오를 직접적으로 사용하는 일이 적어졌기 떄문에 사용하지 않는다. 따라서 유튜브 영상을 가져오는 방법을 알아보자.
유튜브 재생을 바로 띄우고 싶을 경우, 해당 유튜브 영상의 오른쪽 버튼을 클릭하여 "유튜브 소스코드 복사"를 눌러 바로 붙여넣기 하면 띄울 수 있다.
(예시)
<!DOCTYPE html>
<html lang="en">
<head>
    <meta charset="UTF-8">
    <title>Document</title>
</head>
<body>
    <img width="200px" height="auto" src="image (2).png" alt="hello">
    <!-- alt : 이미지 파일이 없는 경우  -->
    <iframe width="989" height="566" src="https://www.youtube.com/embed/ufqTpyR_fXY" frameborder="0" allow="accelerometer; autoplay; encrypted-media; gyroscope; picture-in-picture" allowfullscreen></iframe>
</body>
</html>
4. input form
text, password, date, time, 등 여러 종류들이 있다. 설명보다는 아래 예시를 통해 더 빨리 이해할 수 있다.
<!DOCTYPE html>
<html lang="en">
<head>
    <meta charset="UTF-8">
    <title>Document</title>
</head>
<body>
    <!-- input form 소개 -->
    <input type="text"><br>
    <input type="password"><br>
    <input type="date"><br>
    <input type="time"><br>
    <input type="range"><br>
    <input type="color"><br>
    <input type="radio"><br>
    <input type="checkbox"><br>
    <input type="file"><br>
    <!-- textarea는 창 조절도 가능함 -->
    <textarea name="" id="" cols="30" rows="10"></textarea>
</body>
</html>
5. table과 style
- <table> : 테이블 생성
- <th> : table head. 글씨가 굵으며(bold) 가운데 자동 정렬된다.
- <tr> : table row.
- <td> : table
<table>로 테이블을 생성한 후, <th>로 각 셀의 이름을 입력한 후, <tr>로 테이블 행을 만들고 그 안에 <td>로 셀을 채워나간다.
테이블 병합하기
- rowsplan : 세로(row)로 셀을 병합. 아래로 병합한다.
- colspan : 가로(column)로 셀을 병합. 오른쪽으로 병합한다.
- (사용법) <th colspan="3"> : 가로로 3개의 셀을 병합한다
table style
- border: 테이블을 그리는 선의 스타일 지정
- border-collapse: 테이블 내 충돌하는 선들을 관리
(예시)
<!DOCTYPE html>
<html lang="en">
<head>
    <meta charset="UTF-8">
    <title>Document</title>
    <style>
        table, tr, td, th{
            border: solid 1px black;
            /* 충돌나는 선들이 하나로 나타나게 된다 */
            border-collapse: collapse;
        }
        /* CSS의 주석 */
    </style>
</head>
<body>
    <!-- table>(tr>(td*5))*3 -->
    <table>
        <thead>
            <!-- thead: 나중에 css에서 꾸미기 쉽도록 묶어주는 기능. 기능이 있는 게 아님. -->
        <!-- table row -->
        <!-- table head -->
        <tr>
            <!-- th : 굵은 글씨, 중앙정렬 -->
            <th>순번</th>
            <th>책이름</th>
            <th>가격</th>
            <th>판매량</th>
            <th>판매액</th>
        </tr>
        </thead>
        <!-- table body -->
        <tbody>
        <tr>
            <td>1</td>
            <td>Notion</td>
            <td>7000</td>
            <td rowspan="2">1000</td>
            <td>7,000,000</td>
        </tr>
        <tr>
            <td>2</td>
            <td>노션</td>
            <td>8000</td>
            <td>8,000,000</td>
        </tr>
        </tbody>
        <tfoot>
        <tr>
            <!-- table foot -->
            <!-- colspan : table n칸을 합침 -->
            <td colspan="4">총액</td>
            <td>15,000,000</td>
        </tr>
        </tfoot>
    </table>
</body>
</html>
6. meta tag
html을 맨 처음에 생성하게 되면 아래와 같이 메타 태그가 있음을 볼 수 있다.
<!DOCTYPE html>
<html lang="en">
<head>
    <meta charset="UTF-8">
    <title>Document</title>
</head>
<body>

</body>
</html>
이 메타 태그는 무엇이며, 어떻게 쓰이는지 알아보자. 메타 요소에 대한 설명은 아래와 같다.

그렇다면 어떻게 쓰이는지 알아보자. 예로 들어서 네이버 검색엔진에 '바울랩'이라고 검색해보자. 검색 해보면 아래와 같이 뜬다.

위 사이트에 들어가서 ctrl+u 를 누르게 되면 소스코드가 나온다.

'네이버 추적코드 삽입' 부분을 보게 되면 위 코드들이 '메타 태그'로 되어 있는 것을 알 수 있다. 메타 태그에서 "og:title"이 바울랩이기 때문에 바울립을 검색했을 때 뜨게 된다. 또 "og:description"부분은 검색 엔진에 검색했을 때 나오게 되는 설명 부분이다.
이는 다음이나 네이버 등 사이트의 등록 홈페이지에 보면 어떤 메타 태그를 넣어야 어떻게 검색이 되는지 설명하고 있으므로 사이트를 만들었을 때 참고하면 된다.
7. lorem의 또다른 기능
- loremn: 랜덤 문구가 n글자만 출력된다.
<!DOCTYPE html>
<html lang="en">
<head>
    <meta charset="UTF-8">
    <title>Document</title>
</head>
<body>
    <p>
        <!-- lorem5 : 5글자만 출력-->
        Lorem ipsum dolor sit amet.
    </p>
    <p>
        <!-- lorem100 : 100글자만 출력 -->
        Lorem ipsum dolor sit amet, consectetur adipisicing elit. Voluptatibus sit quia deserunt non repudiandae ipsum consequuntur necessitatibus cumque nulla hic atque ullam natus, illum, aspernatur fuga maxime porro voluptate consequatur veniam aliquid nobis nisi quibusdam itaque. Nisi nostrum, eum laboriosam suscipit neque consectetur at asperiores vitae, culpa eligendi similique ea! Reiciendis, debitis dolore voluptates eaque nemo veritatis aut, sint in cum ut dicta, libero excepturi facilis rerum? Repudiandae quo ratione quos quod eius expedita, impedit iste. Recusandae, voluptates mollitia suscipit soluta incidunt, ad quia, dicta sapiente voluptas quidem alias, perspiciatis aut temporibus! Ipsa debitis quae esse tempora cum reprehenderit non.
    </p>
</body>
</html>
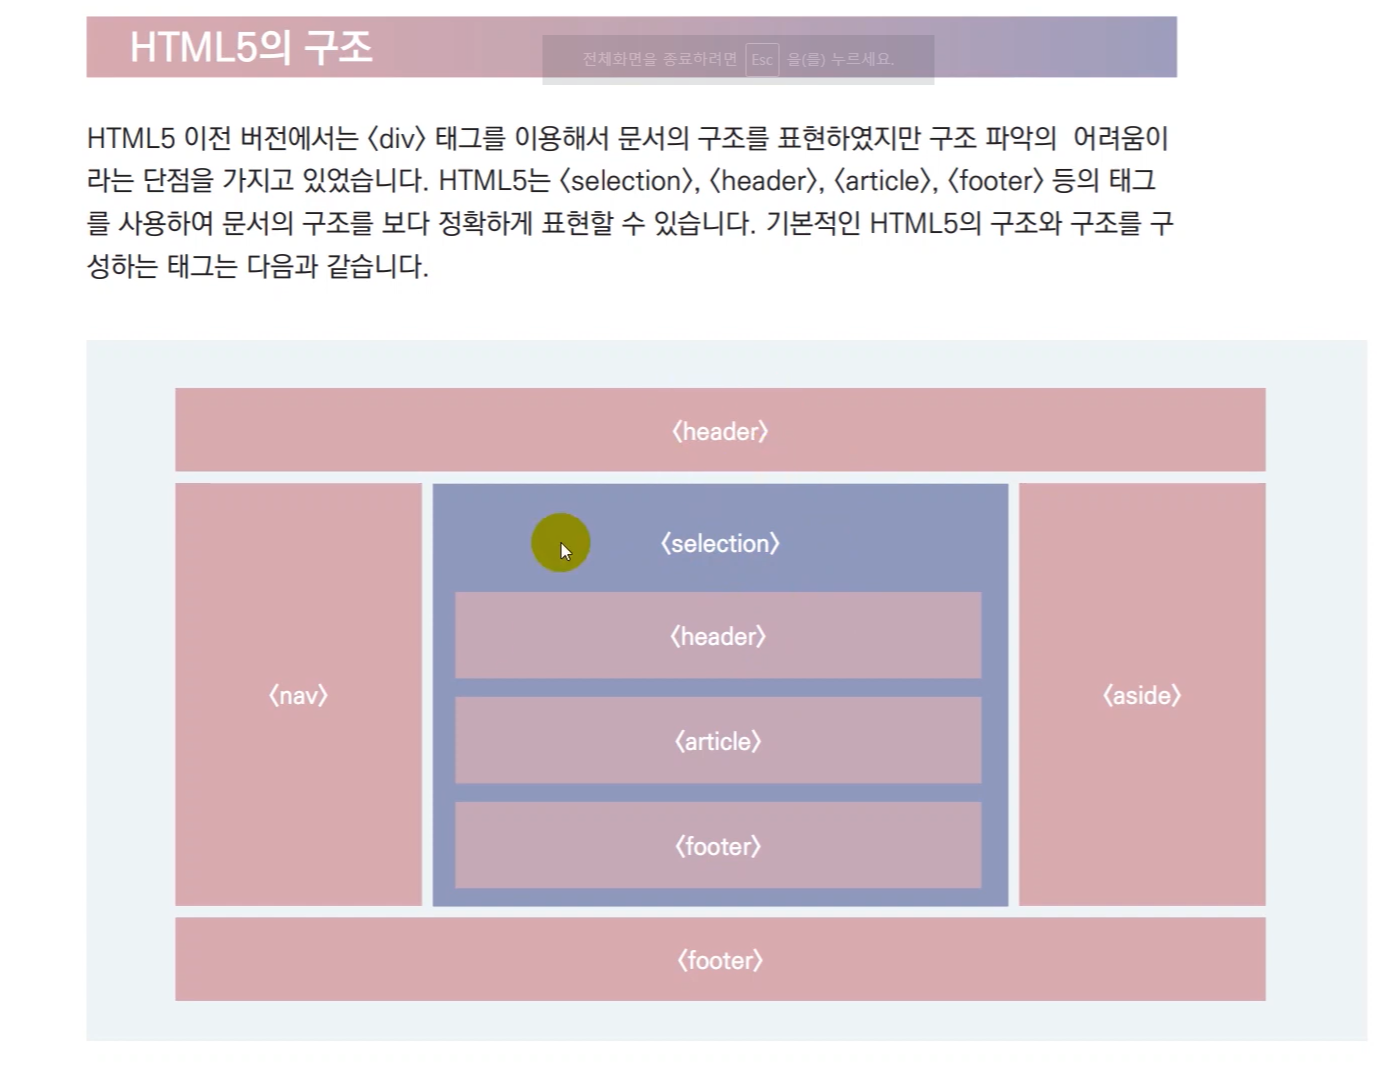
8. HTML 5의 구조
<!DOCTYPE html>
<html lang="en">
<head>
    <meta charset="UTF-8">
    <title>Document</title>
</head>
<body>
    <!-- header>h1{hello world}
    nava>ul>li{menu}*3
    section>h1{section}+article>h1{article}
    aside>h1{aside}
    footer>h1{footer} -->
    <header>
        <h1>hello world</h1>
    </header>
    <nava>
        <ul>
            <li>menu</li>
            <li>menu</li>
            <li>menu</li>
        </ul>
    </nava>
    <section>
        <h1>section</h1>
    </section><article>
        <h1>article</h1>
    </article>
    <aside>
        <h1>aside</h1>
    </aside>
    <footer>
        <h1>footer</h1>
    </footer>

</body>
</html>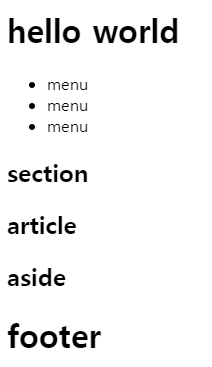
9. 블록 레벨과 인라인 레벨
- 블록 레벨 요소 : 혼자서 한 줄을 차지하는 요소이다. ex) section, p, h
- 인라인 레벨 요소 : 주변 요소와 동일한 줄에 나란히 배치되는 요소이다. ex) strong, image, button, label
<!DOCTYPE html>
<html lang="en">
<head>
    <meta charset="UTF-8">
    <title>Document</title>
</head>
<body>
    <h1>hello world</h1>
    <!-- h1의 옆의 여백이 남아있음에도 불구하고 한칸 띄운다. 왜냐하면 h1가 블록요소이기 때문이다. -->
    <p>hello world</p>

    <!-- 하지만 이미지는 h1에 비해 아래로 내려오지 않고 옆으로 배치가 되는 것을 확인할 수 있다. 이러한 요소를 "인라인 레벨"이라고 한다. -->
    <img width="100" src="image (1).png" alt="">
    <img width="100" src="image (1).png" alt="">
    <img width="100" src="image (1).png" alt="">
    <img width="100" src="image (1).png" alt="">

    <!-- 즉, 정리를 하자면 "블록 레벨 요소"는 혼자서 한 줄을 차지하는 요소이다. ex) section, p, h -->
    <!-- "인라인 레벨 요소"는 주변 요소와 동일한 줄에 나란히 배치된다. ex) strong, image, button, label -->
</body>
</html>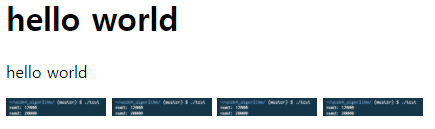
'Education' 카테고리의 다른 글
| [부스트 코딩 뉴비 챌린지 2020] C언어: %p와 %x의 차이점은? (0) | 2020.08.18 |
|---|---|
| [부스트 코딩 뉴비 챌린지 2020] C언어: 포인터에 자료형은 왜 붙일까? (0) | 2020.08.18 |
| [제주코딩베이스캠프] 웹개발 30분 요약 - 4. 30분 요약시리즈 - Python 2부 (0) | 2020.08.18 |
| [제주코딩베이스캠프] 웹개발 30분 요약 - 3. 30분 요약시리즈 - Python 1부 (0) | 2020.08.18 |
| [부스트 코딩 뉴비 챌린지 2020] week5_Q&A : 메모리 해제와 메모리 할당 (0) | 2020.08.17 |

